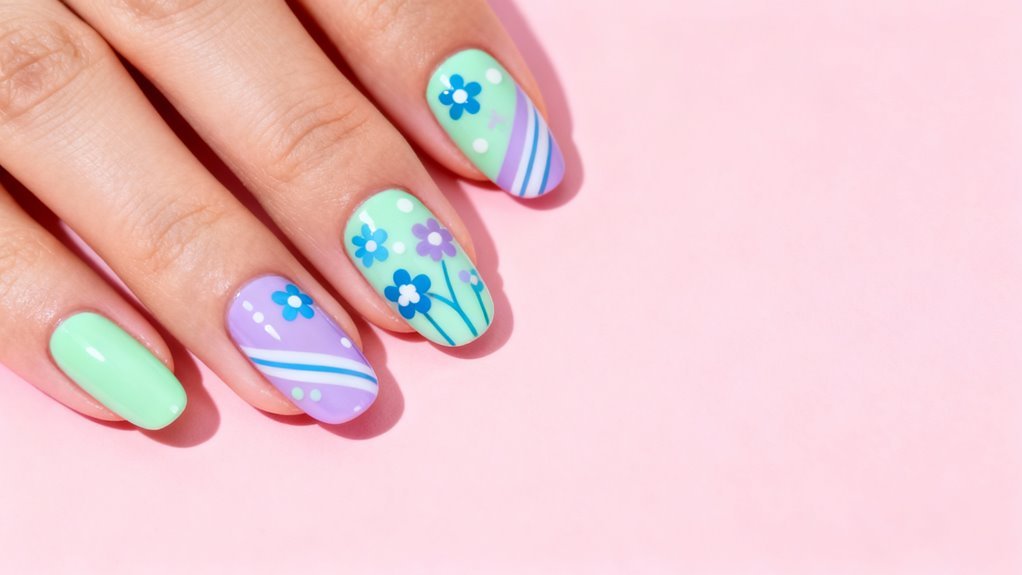
You’ll transform your spring manicure with these seven fresh nail art ideas that capture the season’s playful energy. Try modernized pastel French tips with tiny rhinestones along the smile line, or paint delicate cherry blossom branches extending from your cuticles. Create rainbow gradient ombré using a makeup sponge, connect minimalist daisy chains along nail edges, or add butterfly wing accents for whimsical charm. Mint green polish with gold foil and negative space florals offer elegant alternatives. Master these techniques to achieve salon-worthy results at home.
Key Takeaways
- Pastel French tips with rainbow effects and rhinestone accents modernize the classic manicure for spring freshness.
- Butterfly wing designs in coastal hues or metallic finishes capture the season’s gentle, transformative essence.
- Delicate cherry blossom branches painted diagonally across nails embody spring’s iconic blooming beauty.
- Rainbow gradient ombré transitions from light to dark shades create vibrant, eye-catching spring statements.
- Minimalist daisy chains connected along nail edges offer subtle, wearable floral art perfect for everyday spring style.
Pastel French Tips With a Twist
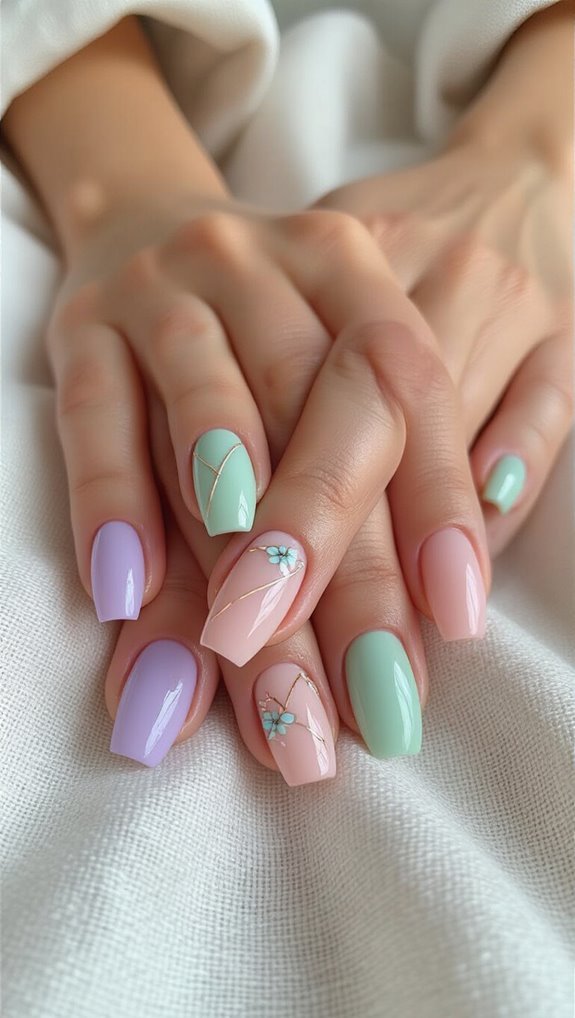
When you’re ready to refresh your classic French manicure for spring, pastel tips offer the perfect seasonal update. You’ll love how mint green, baby pink, or lavender tips instantly modernize the traditional white French style. Try mixing different pastel shades across each nail for a playful rainbow effect that captures spring’s cheerful spirit.
You can elevate this look by creating soft gradients that blend from your natural nail bed into the pastel tip. Use a makeup sponge to dab and blend two complementary colors, creating a dreamy ombré effect. For extra glamour, add tiny rhinestones along the smile line where the pastel meets your natural nail. Place them strategically at the center of each nail or create a delicate scattered pattern.
Don’t forget to seal everything with a quality top coat to protect your design and keep those rhinestones secure. This trendy twist works beautifully for both short and long nails.
Delicate Cherry Blossom Branches
Cherry blossom branches bring the beauty of Japanese springtime directly to your fingertips with their elegant simplicity. You’ll create stunning branch placement by starting from your cuticle area and extending delicate lines diagonally across each nail. Paint thin brown branches first, then add pink or white five-petaled flowers along them.
| Nail Position | Design Element |
|---|---|
| Thumb | Full branch with 3-4 blossoms |
| Index | Single curved branch, 2 blossoms |
| Middle | Diagonal branch with buds |
| Ring | Minimal blossom silhouette |
| Pinky | Tiny branch with 1 blossom |
Use a fine detail brush or dotting tool to achieve precise petals. You can opt for negative space designs where branches float on bare nails, or paint them over soft pink or nude bases. Add tiny green leaves sparingly for extra dimension. Seal your artwork with a glossy topcoat to protect the delicate details and enhance the three-dimensional appearance of your cherry blossom masterpiece.
Rainbow Gradient Ombré
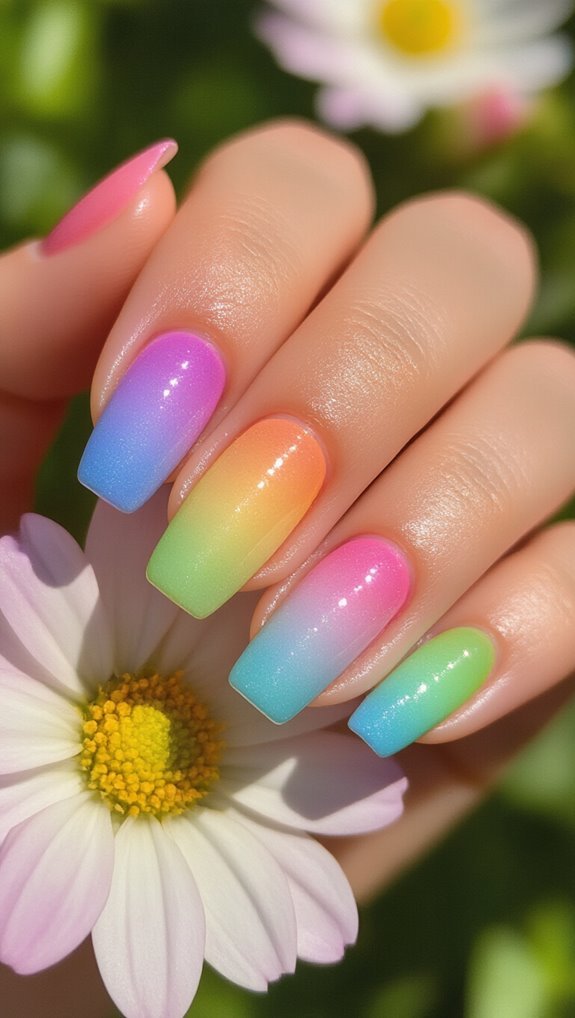
Transform your nails into a vibrant spectrum of spring colors with rainbow gradient ombré that captures the season’s joyful energy. You’ll create a stunning soft fade effect by blending multiple polish shades seamlessly across each nail.
Start with a white base coat to make the colors pop, then apply your lightest shade at the cuticle area.
Work quickly while the polish remains wet, adding progressively darker hues toward the tip. Use a makeup sponge to dab and blend where colors meet, creating smooth transitions.
For a bold statement, choose a neon spectrum ranging from electric pink through orange, yellow, green, blue, to purple. Alternatively, opt for pastel versions for a subtler look.
Seal your design with a glossy topcoat to merge the colors further and add dimension. This technique works beautifully on both short and long nails, instantly elevating your spring manicure game.
Minimalist Daisy Chain Design
You’ll need a thin nail art brush, white and yellow polish, and a dotting tool to create this delicate daisy chain that wraps around your nails.
Start by painting tiny white petals in connected clusters along your nail’s edge, then add yellow centers with the dotting tool for that classic daisy look.
Try this design over nude, sage green, or soft pink bases to capture different spring moods while keeping the minimalist aesthetic intact.
Essential Tools Needed
Gather your supplies before starting this delicate floral design. You’ll need a fine-tipped nail brushset specifically designed for detailed work—look for brushes with synthetic bristles that won’t fray. A dotting tool creates perfect daisy centers, while a thin striping brush forms delicate stems and petals.
Don’t forget your cuticle pusher to prep the nail bed properly. Push back cuticles gently before applying base coat for a clean canvas. You’ll also need white and yellow polish for the daisies, plus a soft green for stems. Keep acetone and cotton swabs nearby for quick corrections.
A steady hand rest or manicure table helps maintain precision during application. Finally, grab quality top coat to seal your design and prevent chipping. These tools ensure professional-looking results every time.
Step-by-Step Application Guide
Now that you’ve assembled your tools, start with a clean base. Apply a sheer pink polish and let it dry completely.
You’ll create spring gradients by dabbing a makeup sponge with white polish at the tips, blending downward for a soft ombre effect. Once dry, apply a clear top coat as your working surface.
For the daisy chain, dip a dotting tool in white polish and create five small dots in a circle formation. Add a yellow center dot.
Connect each flower with thin green stems using a striping brush. If you’re not confident with freehand work, botanical stencils can guide your placement. Position them before dotting to ensure even spacing.
Seal everything with a quick-dry top coat, and you’re done.
Color Combination Ideas
While traditional daisy chains feature white petals and yellow centers, experimenting with unexpected color pairings can transform this classic design into something uniquely yours.
You’ll find that swapping classic white for coral blush petals creates a warm, romantic look that’s perfect for spring evenings. Try pairing sunshine yellow centers with lavender petals for a playful twist that catches everyone’s attention.
Don’t limit yourself to conventional combinations. Mix mint green petals with rose gold centers, or create gradient effects using multiple shades within the same color family.
You can also reverse the traditional scheme—use dark petals with light centers for dramatic contrast. Consider your skin tone when selecting colors; cooler undertones complement pastels beautifully, while warmer complexions shine with vibrant, saturated hues.
Butterfly Wing Accents
You’ll transform your spring manicure with butterfly wing accents by mastering three key elements. First, decide whether you want the wings positioned at your nail tips, centered on accent nails, or cascading diagonally across multiple fingers.
Next, you’ll choose between realistic monarch-inspired oranges and blacks, pastel rainbow gradients, or metallic holographic finishes, then follow specific stamping, freehand, or decal application methods to achieve professional-looking results.
Design Placement Options
When deciding where to place butterfly wing accents on your nails, consider how different positions create unique visual impacts. You’ll find that centered designs on accent nails draw immediate attention, while corner placements offer subtle elegance. Try positioning wings along diagonal tips for a dynamic, modern look that elongates your nail beds.
You can spread designs across multiple nails to create a cohesive butterfly story. Place one wing on your ring finger and its counterpart on the middle finger for an interactive effect. Don’t overlook the thumb—it’s perfect for showcasing larger, detailed wings.
For minimalist appeal, position tiny butterflies near the cuticle area or let them “fly” across the nail’s negative space. Your accent placement choices transform simple manicures into artistic statements that capture spring’s playful spirit.
Color Palette Choices
As you select colors for your butterfly wing accents, draw inspiration from nature’s own palette of monarchs, swallowtails, and painted ladies. You’ll create stunning designs by mixing vibrant oranges with deep blacks or combining iridescent blues with soft purples.
Consider these color combinations for maximum impact:
- Spring pastels – Blend baby pink, lavender, and mint green for delicate wings that capture the season’s gentle essence
- Coastal hues – Layer turquoise, seafoam, and sandy beige to mimic tropical butterfly species
- Bold contrasts – Pair electric yellow with midnight blue for eye-catching statement nails
Don’t forget to add metallic accents or holographic topcoats to replicate the shimmer of real butterfly wings. You can also incorporate gradient techniques, transitioning from light to dark shades within each wing section for authentic depth.
Application Techniques Guide
Before attempting your butterfly wing design, gather your essential tools: a thin detail brush, dotting tool, and steady hand for precise application.
Start with thorough nail prep—file, buff, and apply a base coat to create the perfect canvas. You’ll need excellent brush control to execute delicate wing patterns.
Begin by painting your base color and letting it dry completely. Load your detail brush with minimal polish to avoid blob formation.
Create the wing outline using gentle, sweeping strokes from the nail’s center outward. Add symmetrical patterns on both sides, working quickly before the polish dries. Use your dotting tool for small accent spots along the wing edges.
Build layers gradually—don’t rush thick applications that’ll smudge. Seal your design with a quality top coat for lasting brilliance.
Mint Green With Gold Foil Details
For a fresh take on spring nails, you’ll love the elegant combination of mint green polish with delicate gold foil accents. This mint manicure perfectly captures spring’s renewal while adding sophisticated sparkle that catches light beautifully. You’ll find this design works for both casual brunches and evening events.
Here’s what makes this combination special:
- Versatile placement – Apply gold foil to tips, cuticle lines, or create abstract patterns across the nail
- Easy customization – Mix chunky and fine foil pieces for varied texture and visual interest
- Long-lasting impact – Seal foil with quality topcoat to prevent chipping and maintain shine
Start with two coats of mint polish, letting each dry completely.
While the final coat remains slightly tacky, press gold accents gently onto desired areas using tweezers or a toothpick. Don’t overthink placement—random patterns often look most artistic. Finish with a gel-effect topcoat to lock everything in place and enhance the gold’s reflective qualities.
Negative Space Floral Patterns
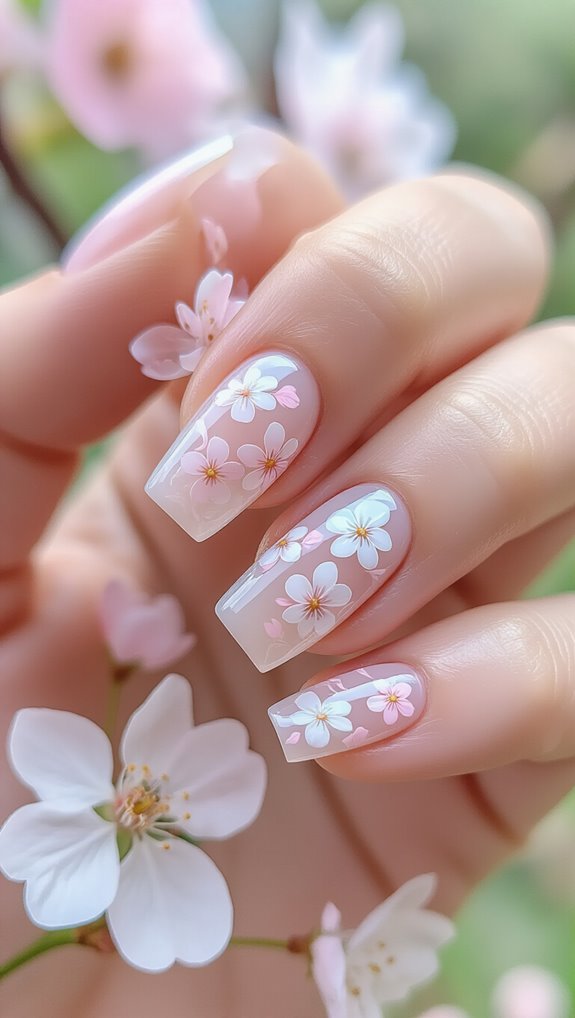
Negative space transforms traditional floral nail art into a modern masterpiece by leaving portions of your natural nail exposed within the design. You’ll create depth and sophistication by strategically placing empty areas that become part of the artwork itself.
Start with a clear base coat to protect your nails, then use thin brushes to paint translucent petal outlines that frame the bare nail beneath.
You can achieve stunning negative space bouquets by painting only the edges of flowers, leaving centers open, or creating geometric cutouts within blooms. Try painting delicate stems and leaves while keeping flower heads empty, or reverse the technique for an unexpected twist.
White polish works beautifully for outlining roses and daisies against nude nails, while black creates dramatic contrast for edgier looks. Add tiny dots around the negative spaces to enhance the design without overwhelming it. This technique suits both short and long nails, making it versatile for any spring occasion.
Frequently Asked Questions
How Long Do Spring Nail Art Designs Typically Last?
Your spring nail art’s seasonal longevity depends on several wear factors.
You’ll typically get 7-14 days from regular polish designs, while gel manicures can last 2-3 weeks.
If you’re using press-ons, they’ll stay put for about a week.
Your daily activities, nail growth rate, and aftercare routine directly impact how long the design lasts.
You’ll extend durability by applying a top coat every few days and wearing gloves during cleaning tasks.
What’s the Average Cost for Professional Spring Nail Art?
You’ll typically pay $30-80 for professional spring nail art at most salons, though intricate designs can reach $100+.
Salon pricing varies by location, complexity, and whether you’re adding art to a basic manicure or gel service.
If you’re considering DIY budgeting, you can create similar looks at home for $15-30 in supplies like dotting tools, striping tape, and seasonal polishes that you’ll reuse multiple times throughout spring.
Can I Create These Designs on Natural or Artificial Nails?
You can create spring nail art designs on both natural nails and artificial options. Your natural nails work perfectly for simpler designs like florals or pastels, though they’ll need a strong base coat for durability.
If you prefer longer lengths or more elaborate art, acrylic extensions provide a sturdy canvas that won’t chip as easily. You’ll find that gel overlays on either nail type help your spring designs last longer between touch-ups.
Which Nail Shape Works Best for Spring Nail Art?
You’ll find that soft squoval and almond shapes work beautifully for spring nail art.
The almond revival trend offers an elegant canvas that elongates your fingers while providing ample space for floral designs and pastel gradients.
Soft squoval gives you the best of both worlds – rounded edges that won’t snag with a practical flat tip that’s perfect for detailed artwork.
Both shapes complement delicate spring patterns and won’t break easily.
How Do I Remove Intricate Nail Art Without Damaging Nails?
You’ll remove intricate nail art safely by starting with gentle soaking in warm, soapy water for 10-15 minutes. This softens the polish and decorations.
Next, apply acetone-soaked cotton pads to each nail, wrapping them in foil for 5 minutes.
After removal, treat your nails to an oil massage using cuticle or vitamin E oil. This nourishing step rehydrates the nail bed and prevents brittleness from the acetone exposure.
Conclusion
You’ve got seven gorgeous spring nail designs to choose from, so why not try them all? Start with the easiest minimalist daisy chains and work your way up to intricate butterfly wings. Don’t be afraid to mix techniques – combine pastel French tips with gold foil or add cherry blossoms to negative space. Your nails are the perfect canvas for celebrating spring’s arrival. Book that nail appointment or grab your polish collection and let your creativity bloom.