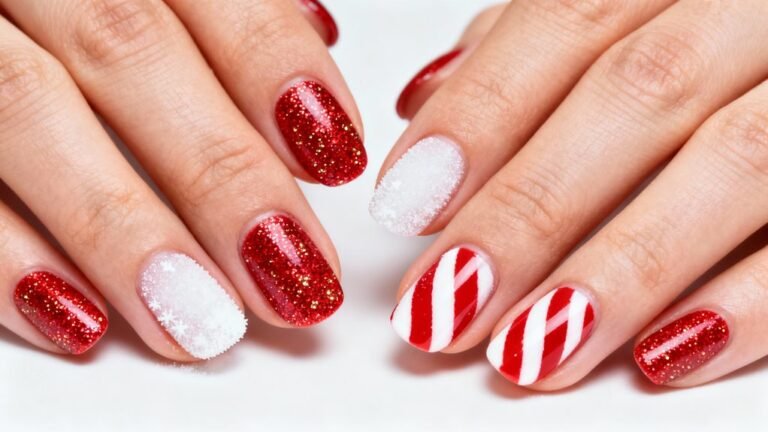
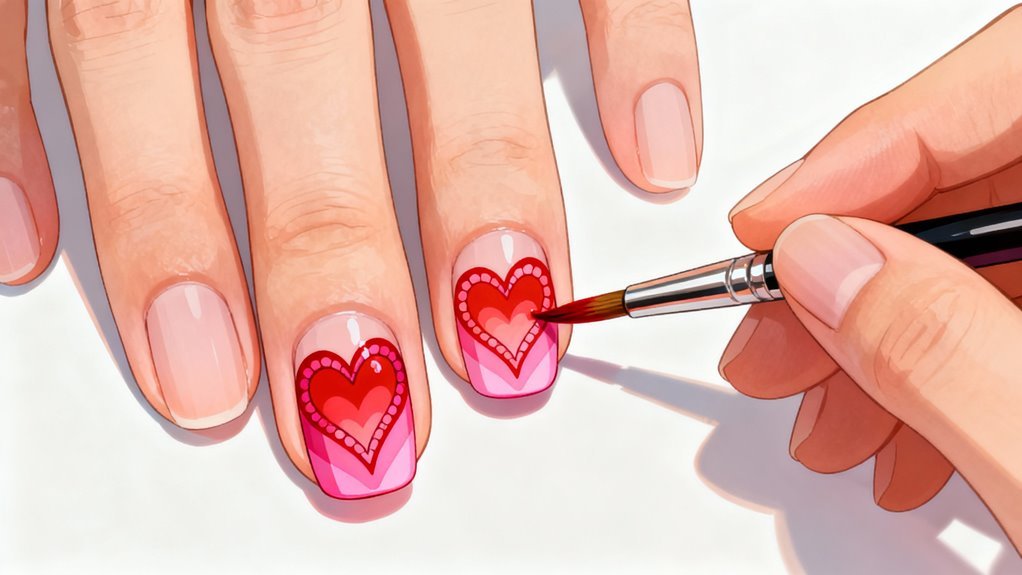
You’ll create stunning Valentine nail art by starting with a clean base coat and choosing from simple heart accents to elaborate designs. Paint soft pink or red polish as your foundation, then add romantic elements using dotting tools for hearts, sponges for ombre effects, or thin brushes for delicate lace patterns. Try conversation heart candies with pastel bases and tiny phrases, or glitter gradients building from tips downward. Master these techniques to achieve salon-quality romantic nails at home.
Key Takeaways
- Start with clean nails, apply base coat thinly, and cap free edges to prevent chipping before adding Valentine designs.
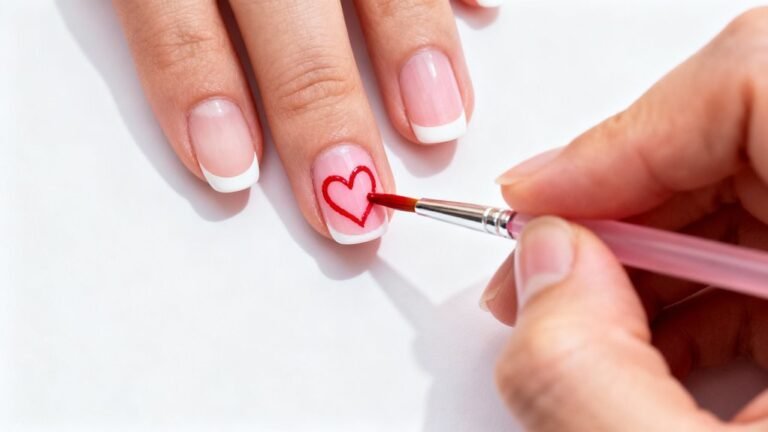
- Create simple heart accents using dotting tools to make two dots, then drag to a point with a toothpick.
- Apply romantic ombre effects by dabbing overlapping red and pink polish stripes onto nails using a makeup sponge.
- Add conversation heart designs with pastel bases and write romantic phrases using fine detail brushes or nail art pens.
- Seal finished nail art with quality topcoat, reapplying every three days to protect delicate Valentine designs from smudging.
Essential Tools and Materials for Valentine Nail Art
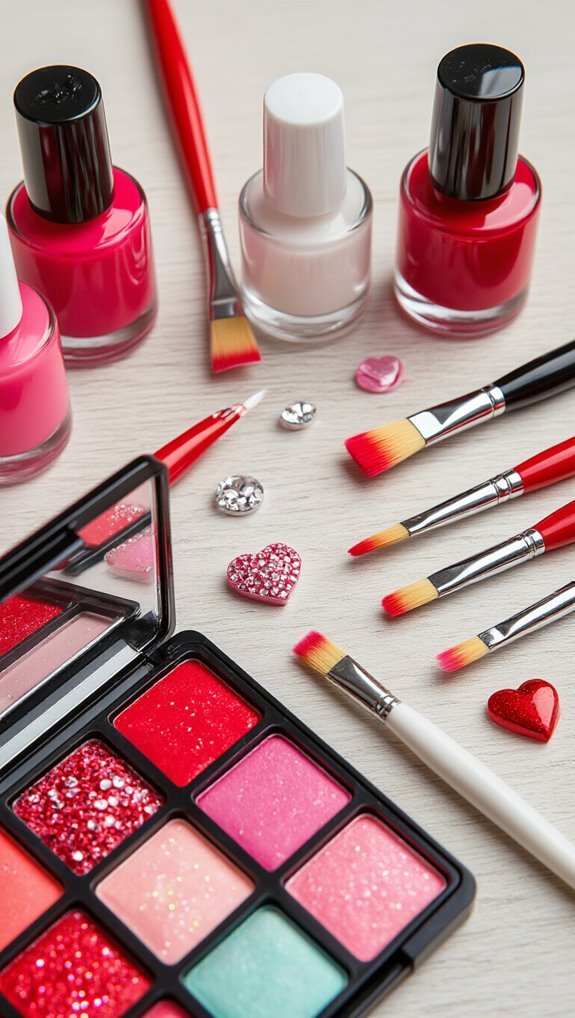
Three basic categories of supplies will set you up for creating stunning Valentine nail art at home. First, you’ll need quality base products: a ridge-filling primer, pink or red polishes, and a quick-dry topcoat.
Don’t forget white polish for creating contrast and nude shades for subtle backgrounds.
Second, gather your art tools. You’ll want dotting tools in various sizes for hearts and berry motifs, thin brushes for painting rose stems and delicate lines, and striping tape for geometric designs.
A toothpick works perfectly for marbling effects.
Third, stock decorative elements. Grab heart-shaped stickers, rhinestones in red and pink, glitter in multiple sizes, and nail stamps with romantic patterns.
You’ll also need acetone and cotton swabs for cleanup, plus a small dish for mixing custom colors. Having these supplies ready ensures you’re prepared to execute any Valentine design you’ve envisioned.
Simple Heart Accent Nails for Beginners
Now that you’ve gathered your supplies, let’s start with the easiest Valentine nail design that delivers maximum impact.
Paint all your nails with a base color—soft pink or classic red works beautifully. Once dry, choose your ring fingers as accent nails.
For negative space hearts, apply tape in a heart shape on your accent nail before painting. Remove the tape while polish is slightly wet to reveal the heart-shaped window. This technique creates modern, minimalist designs that’ll impress everyone.
If you’re more comfortable with hand drawn decals, use a thin brush or toothpick dipped in contrasting polish. Start with two dots side by side, then drag the polish down to form a heart’s point. Practice on paper first to build confidence.
Finish with a clear top coat to seal your design. You’ll master this beginner-friendly technique in under 30 minutes, and it’s perfect for Valentine’s Day dates or Galentine’s celebrations.
Classic Red and Pink Ombre Tutorial
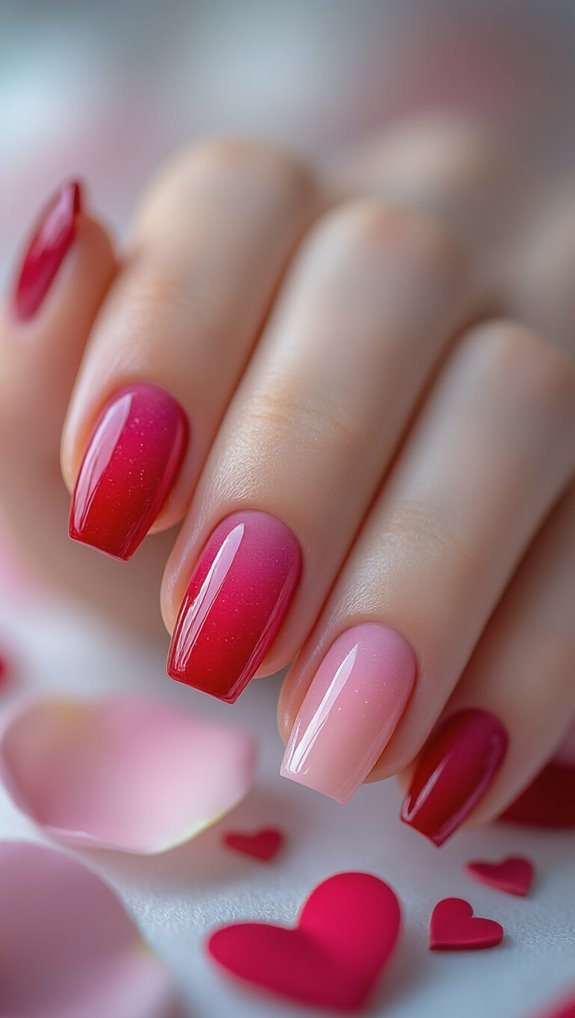
While heart accents create charming focal points, ombre nails offer a sophisticated gradient that screams romance. You’ll master this classic look using simple ombre techniques that blend red into pink seamlessly.
Start with these essential supplies:
- Makeup sponge cut into small squares
- Clear base coat and top coat
- Red and pink polish (choose complementary shades)
- Liquid latex or tape for cleanup
Apply your base coat, then paint nails with the lighter pink shade. Let it dry completely. On a piece of foil, create parallel stripes of pink and red polish, slightly overlapping them. Dab your sponge into the polish and press onto your nail, rolling slightly. Repeat until you’ve achieved the desired gradient intensity.
The color psychology behind this combination works perfectly—red evokes passion while pink softens with tenderness. You’re creating visual harmony that captures Valentine’s essence. Seal everything with top coat for a glossy, professional finish that’ll last through your romantic celebrations.
Love Letter and Envelope Design
You’ll transform your nails into tiny love letters by starting with a soft pink or cream base that mimics stationery paper.
Create the envelope flap by painting a triangular shape at your nail tip using white polish and a thin brush.
Add a red heart where the envelope “seals” and draw thin black lines to outline the envelope’s edges for a realistic postal effect.
Base Color Selection
When creating a love letter and envelope nail design, choosing the right base color sets the foundation for your entire look. You’ll want shades that complement the romantic theme while providing enough contrast for your envelope details to pop.
Consider these versatile base options:
- Classic nude or soft pink – Creates subtle elegance that won’t compete with intricate designs
- Rose gold – Adds metallic warmth and pairs beautifully with white envelope accents
- Dusty rose – Offers vintage charm perfect for antique-style love letters
- Mauve glow – Provides sophisticated depth while maintaining femininity
Apply two thin coats of your chosen base, letting each dry completely. If you’re using shimmer formulas like rose gold, ensure even distribution by rolling the bottle between your palms first.
A quality base color makes detailed artwork easier to execute.
Envelope Shape Creation
Now that your base color has dried completely, it’s time to create the envelope shape that’ll transform your nails into miniature love letters.
You’ll start by painting a white or light pink rectangle on the lower two-thirds of your nail. This forms your envelope’s body.
Next, create the distinctive triangular flap. Using a thin brush, draw diagonal lines from the rectangle’s top corners, meeting at a center point. These corner flap structures give your hand shaped envelopes their authentic look.
For added dimension, outline the envelope with a fine red or pink line. Don’t forget to add a small heart sticker or hand-painted heart where the flap closes. This detail sells the love letter illusion and makes your Valentine’s nail art truly special.
Heart Seal Details
After positioning your envelope design, the heart seal becomes the focal point that brings your love letter nails to life.
You’ll create dimension using specialized techniques that elevate this classic Valentine’s motif.
Apply your heart seal with these methods:
- Use foil stamping for metallic shimmer that catches light beautifully
- Add embossed texture with thick gel polish and a dotting tool
- Layer translucent red over white for depth
- Outline with fine black striper for definition
Position the heart where envelope flaps would naturally meet.
Press foil transfer sheets firmly for complete adhesion.
Build embossed texture gradually with two thin coats rather than one thick application.
You’re creating a miniature wax seal effect that’ll make your romantic nail art stand out.
Glitter Gradient With Rose Gold Accents
You’ll transform plain nails into glamorous Valentine’s statements with a glitter gradient topped by rose gold accents.
Start by gathering your rose gold glitter polish, makeup sponge, clear top coat, and base coat to protect your natural nails.
The gradient technique involves dabbing glitter from the tips downward, building intensity with each layer for a professional ombré effect.
Essential Materials Needed
Gather your supplies before diving into this glamorous nail design that combines sparkle with sophisticated rose gold touches. You’ll need quality materials to achieve professional-looking results at home.
Start with these essentials:
- Base coat – protects natural nails from staining
- Pink or nude seasonal polish – creates the perfect Valentine’s foundation
- Fine glitter polish – builds gradient intensity
- Rose gold foil or chrome powder – adds metallic dimension
Don’t forget a makeup sponge for blending the glitter gradient smoothly. You’ll also need rubbing alcohol, cotton swabs for cleanup, and a high-quality top coat to seal everything.
For texture experiments, consider adding small rhinestones or pearl accents. Keep nail art brushes handy for precise application of the rose gold details. These tools ensure you’ll create stunning Valentine’s nails that last.
Base Coat Application
With your materials ready, proper base coat application sets the foundation for your glitter gradient design. You’ll need to prep your nails first—remove old polish, push back cuticles, and ensure adequate nail hydration with cuticle oil. Let it absorb for two minutes before wiping excess.
Apply your base coat in thin, even strokes from cuticle to tip. Don’t overload the brush—polish thinning occurs naturally when you work with smaller amounts. Cap the nail’s edge to prevent chipping.
| Step | Action |
|---|---|
| Clean | Remove oils with rubbing alcohol |
| Hydrate | Apply cuticle oil, wait 2 minutes |
| Wipe | Remove excess moisture |
| Apply | Stroke base coat thinly |
| Seal | Cap free edge |
Allow 60-90 seconds for complete drying. Your base coat creates the perfect canvas for rose gold accents and glitter application.
Creating Gradient Effect
After your base coat has dried completely, the gradient effect begins with strategic glitter placement at the nail tips. You’ll create a stunning ombre blending effect using the sponge technique for seamless transitions.
Apply rose gold polish to a makeup sponge’s edge. Dab it onto your nail tips, working downward about one-third of the nail’s length. The key steps include:
- Press gently to avoid oversaturation
- Build intensity with multiple thin layers
- Blend edges while polish remains wet
- Clean excess with an angled brush dipped in acetone
Once you’ve achieved the desired opacity, add loose glitter to the tips while the polish is tacky. This intensifies the gradient’s sparkle. Seal everything with a quality top coat, ensuring you cap the nail’s free edge for longevity.
Minimalist Line Art Hearts and Arrows
Simplicity speaks volumes when you’re creating minimalist line art hearts and arrows on your nails. You’ll need a thin nail art brush or striping pen and steady hands for these delicate designs.
Start with a neutral base coat—nude, white, or soft pink works perfectly. For minimalist heartbeats, draw a continuous line across your nail, creating small heart outlines at intervals. Don’t worry about perfection; slight variations add charm. Use black or deep red polish for striking contrast.
Create arrowhead silhouettes by drawing a straight horizontal line, then adding a triangular tip and fletching at the opposite end. You can position arrows diagonally, vertically, or create a pattern with multiple small arrows.
Mix both designs across different nails for variety. Place a single heart on your ring finger and arrows on surrounding nails. These designs dry quickly and don’t require top-heavy embellishments, making them perfect for Valentine’s celebrations that demand understated elegance.
Marble Effect With Romantic Color Swirls
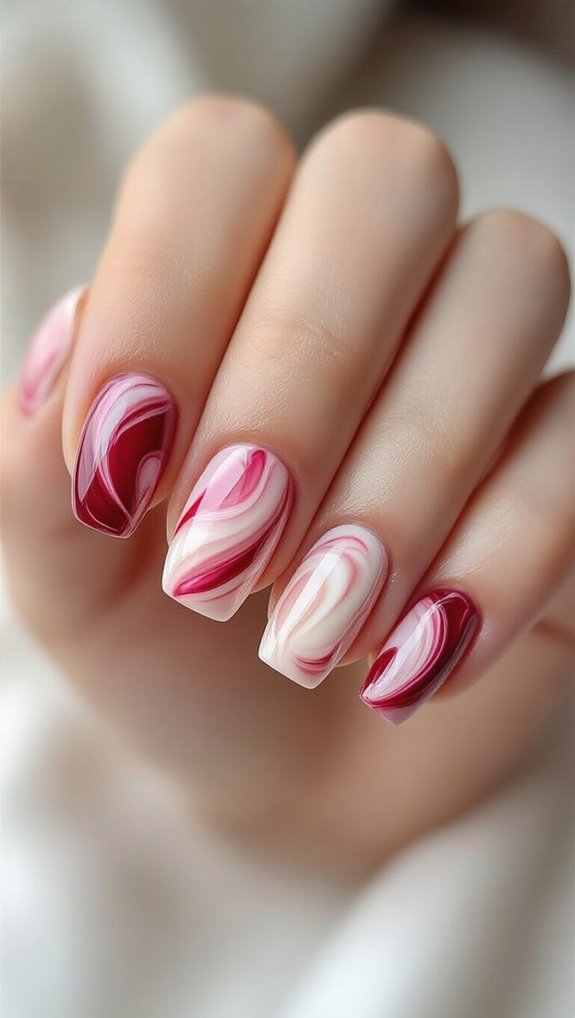
You’ll create stunning marble nails by choosing complementary Valentine’s colors like soft pinks, deep reds, and creamy whites that blend beautifully together.
Start with a white base coat, then drop small dots of your chosen colors onto the wet surface before using a toothpick to swirl them into organic patterns.
Work quickly since the polish needs to stay wet for the marbling technique to work, and don’t overmix or you’ll muddy the colors.
Color Selection Tips
When creating marble nail art for Valentine’s Day, you’re working with a technique that relies heavily on strategic color choices to achieve those dreamy, romantic swirls. You’ll want to select shades that complement each other while creating beautiful ombre contrasts throughout your design.
Consider these color combinations for stunning results:
- Classic red and white with pink transitions
- Burgundy and rose gold for sophisticated elegance
- Soft pink paired with champagne metallic accents
- Deep plum swirled with silver and blush tones
Don’t overwhelm your design with too many colors—three to four shades work best. Choose one dominant color, add a lighter complementary shade, then incorporate metallic accents sparingly for dimension.
Test your color combinations on practice tips first to ensure they’ll blend seamlessly when you’re creating the actual marble effect.
Swirling Technique Steps
Now that you’ve selected your perfect color palette, mastering the swirling technique will bring your marble design to life.
Fill a small cup with room-temperature water and drop your first paint droplet onto the surface. Watch it spread into a thin circle before adding your second color directly in the center. Continue alternating colors, creating concentric rings.
Using a toothpick, draw lines from the center outward, then swirl gently to create your water marble pattern. Don’t overmix—you’ll muddy the colors. Dip your nail at a 45-degree angle into the design, keeping it submerged for three seconds. Before removing your finger, use the toothpick to gather excess polish from the water’s surface. You’ll achieve stunning romantic swirls every time.
Conversation Heart Candy Inspired Nails
Breaking out the pastel polish collection is the perfect starting point for creating conversation heart candy inspired nails. You’ll transform your fingertips into miniature Valentine’s messages that capture the charm of these iconic candies.
Start with a base coat, then apply soft pastel shades—pink, lavender, mint, or yellow—to each nail. Let them dry completely before adding your candy typography. Use a fine detail brush or nail art pen to write classic phrases across your nails:
- “BE MINE” in bold red letters
- “XOXO” with alternating colors
- “TRUE LOVE” in cursive script
- “CUTIE” with tiny hearts as dots
Keep your pastel messages centered and readable by practicing on paper first. You can seal everything with a glossy topcoat that mimics the candy’s sugary finish. For added dimension, outline each nail with a thin white border to replicate the candy’s edges. This design works beautifully on both short and long nails.
Lace Pattern Overlay Technique
Mastering the lace pattern overlay technique elevates your Valentine’s nail art from simple to sophisticated. You’ll create delicate designs that mimic vintage lace patterns with minimal effort.
Start with a pale pink or nude base coat that’s completely dry. Using white or off-white polish and a thin striping brush, draw interconnected half-circles along your nail’s edge. Add dots between each curve to form the foundation of your lace design. For floral filigree details, create tiny petals radiating from central points using short, controlled strokes.
You can also use lace nail stickers or stamping plates for precision. Apply them over your base color, then seal with clear topcoat. If you’re hand-painting, work in sections to maintain steady control. Practice on paper first to perfect your technique.
The key is keeping your patterns delicate and consistent. Don’t overload your brush with polish—thin layers create the most realistic lace effect.
Tips for Making Your Valentine Nail Art Last Longer
While your intricate Valentine nail art deserves to shine through every romantic dinner and celebration, proper preservation techniques will keep your designs pristine for up to two weeks. You’ll need to invest in a quality long lasting topcoat that’s specifically formulated to protect nail art without smudging delicate details.
Before applying any polish, prioritize nail bed care by gently pushing back cuticles and buffing away ridges. Here’s what you should do daily:
- Apply cuticle oil around your nails every morning
- Wear gloves when cleaning or doing dishes
- Reapply thin topcoat layers every three days
- File away chips immediately to prevent peeling
Don’t skip the base coat—it’s your foundation for longevity. When you’re finished with your design, cap the free edge with each polish layer to seal everything in place. Quick-dry drops won’t just save time; they’ll help prevent smudges during the crucial first hour.
Frequently Asked Questions
Can I Create Valentine Nail Art on Natural Short Nails?
Yes, you can absolutely create valentine nail art on natural short nails!
Your short canvas works perfectly for minimal motifs like tiny hearts, dots, or simple stripes. You’ll find these designs actually look more proportionate on shorter nails than elaborate patterns would.
Try painting single accent hearts, delicate French tips with red polish, or small cupid’s arrows.
Don’t let nail length stop you from expressing your creativity this Valentine’s Day.
How Much Does Professional Valentine Nail Art Typically Cost at Salons?
You’ll typically pay $30-$80 for professional Valentine nail art at salons, depending on design complexity and your location.
Basic hearts and simple patterns start around $30, while intricate designs with gems or 3D elements can reach $80+. Many salons offer special Valentine custom packages that include themed art with gel polish for $50-$65.
Salon pricing often includes the base manicure, so you’re getting complete nail care along with festive artwork.
Which Valentine Nail Designs Work Best for Workplace Settings?
You’ll want to choose subtle designs that maintain professionalism while celebrating the holiday.
Opt for neutral tones like nude, soft pink, or blush with minimalist hearts as accent details.
Try a single small heart on your ring finger, delicate heart outlines in rose gold, or tiny heart stamps near the cuticle.
French manicures with heart-shaped tips or negative space designs with geometric hearts also work perfectly for conservative office environments.
How Far in Advance Should I Do Valentine Nails Before a Date?
You’ll want to do your Valentine nails 1-2 days before your date for the best schedule timing. This gives you enough buffer if you need touch-ups but ensures they’re fresh and chip-free.
For maintenance tips, apply a top coat daily and keep cuticle oil handy. If you’re doing gel nails, you can extend to 3-4 days ahead since they’re more durable.
Don’t rush the process – you’ll need proper drying time between coats.
Can Men Wear Subtle Valentine-Themed Nail Art Designs?
Absolutely! You can rock Valentine nail art with masculine motifs that feel authentic to your style. Try understated accents like single red stripes, geometric hearts, or matte black with tiny red dots on accent nails.
You’ll find that subtle designs on shorter nails look sharp and intentional. Consider dark burgundy bases, minimalist line work, or even a simple clear coat with one small heart detail. Express yourself however you’re comfortable.
Conclusion
You’ve now mastered eight stunning Valentine nail art designs that’ll make your fingertips the perfect accessory for February 14th. Whether you’re rocking simple heart accents or intricate lace patterns, your nails will spread love with every gesture. Don’t forget to seal your artwork with a quality top coat and follow those longevity tips. You’re ready to create romantic nail art that’ll last through all your Valentine’s celebrations and beyond.