You’ll create stunning watercolor effects with blooming gel by first applying your base color and curing it completely. Then paint a thin layer of blooming gel over the nail without curing. Quickly drop dots of gel polish onto the wet blooming gel and watch them spread into organic patterns. Work fast since timing’s crucial for proper spreading. Once you’re satisfied with the design, cure for 60 seconds and seal with top coat. Master these basics and you’ll discover endless pattern possibilities from galaxy fades to marble swirls.
Key Takeaways
- Apply a thin layer of blooming gel over cured base color, then immediately drop gel polish dots onto the wet surface.
- Watch dots naturally spread outward for 3-5 seconds, creating organic bloom patterns without manipulation or additional tools.
- Work quickly since blooming gel remains wet and non-curing until you place it under the UV/LED lamp.
- Cure the design for 60 seconds once satisfied, then seal with top coat and cure again for durability.
- Create various effects by adjusting dot placement: center dots for flowers, edge dots for fades, or random drops for watercolor designs.
Essential Tools and Materials for Blooming Gel Art
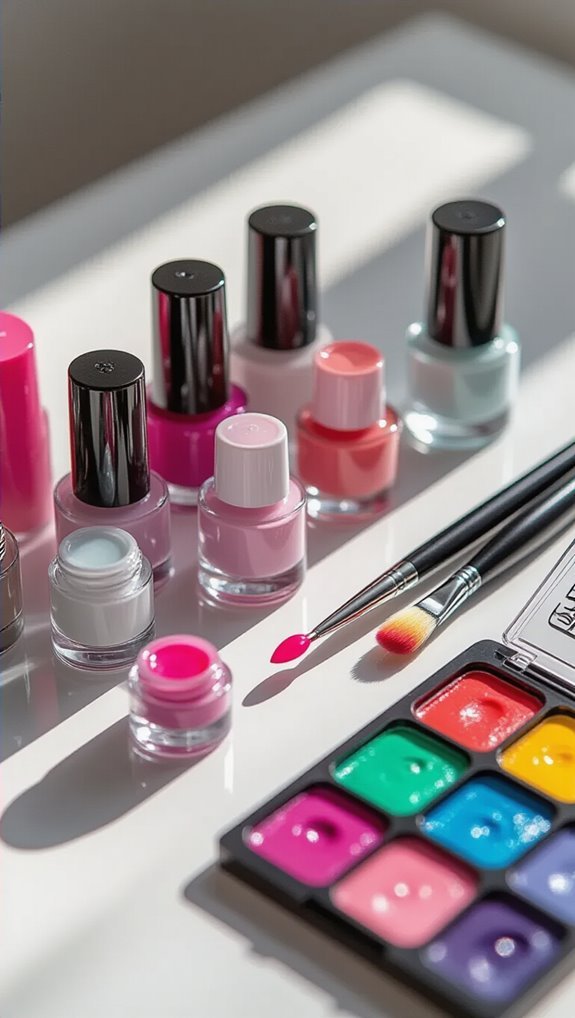
Before you can create stunning blooming gel designs, you’ll need to gather the right tools and materials that make this unique technique possible. Start with blooming gel itself—a specialized clear formula that creates the spreading effect. You’ll also need regular gel polish in various colors, a UV or LED lamp, and isopropyl alcohol for cleaning.
Your brush selection directly impacts design quality. Choose thin detail brushes for precise work and flat brushes for broader strokes. Dotting tools help create perfect circles and flower centers. Understanding color theory enhances your designs—complementary colors create vibrant contrasts while analogous shades offer harmonious blends.
Don’t forget base and top coats specifically formulated for gel systems. Stock lint-free wipes, cuticle oil, and a good-quality file. Consider investing in a color wheel to master combinations. With these essentials ready, you’re equipped to explore the creative possibilities of blooming gel art.
Preparing Your Nails for the Blooming Technique
Before you can create stunning blooming gel designs, you’ll need to properly prep your nail surface.
Start by removing any old polish, then clean your nails with rubbing alcohol and shape them with a file to your desired length and style.
Once your nails are clean and shaped, apply a thin layer of gel base coat to each nail and cure it under your UV or LED lamp according to the manufacturer’s instructions.
Clean and Shape
Transform your natural nails into the perfect canvas by starting with thorough preparation. You’ll need to remove any existing polish completely using acetone or nail polish remover.
Next, focus on cuticle grooming by gently pushing back the skin with a cuticle pusher and trimming any excess carefully.
Shape your nails using these essential steps:
- File each nail in one direction to prevent splitting
- Create uniform length across all ten nails
- Round the edges slightly for a natural look
- Smooth rough spots with gentle strokes
After shaping, nail buffing becomes crucial for adhesion. Use a fine-grit buffer to create slight texture on the nail surface.
This roughness helps gel polish grip better. Finally, cleanse your nails with rubbing alcohol to remove oils and debris.
Base Coat Application
Once you’ve prepped your nails perfectly, you’re ready to apply the base coat that’ll serve as the foundation for your blooming gel design. Start by selecting the right brush—a flat, synthetic brush works best for smooth, even coverage.
Apply a thin layer from the center of your nail, pushing toward the cuticle line without flooding it. This cuticle protection technique prevents lifting and ensures longer-lasting results.
Work the polish down to the free edge, sealing the tip with a horizontal stroke. Don’t forget to cap the edges—this prevents chipping and extends your manicure’s life.
Cure under your LED lamp for 30-60 seconds, depending on the manufacturer’s instructions. If you notice any bubbles or streaks, you’ll need to remove and reapply before moving forward.
Understanding How Blooming Gel Formula Works
When you apply blooming gel to your nails, you’re working with a specialized formula that stays wet and doesn’t cure under UV or LED light.
This unique gel creates the perfect environment for nail polish to spread and bloom into organic patterns.
The chemical interaction between the blooming gel and regular polish causes pigments to disperse naturally across your nail’s surface.
The formula manipulates surface tension, allowing dropped polish to expand rather than stay in place.
Here’s what makes blooming gel effective:
- Non-curing properties – Remains wet throughout the design process
- Low viscosity – Thinner consistency than regular gel polish
- Dispersing agents – Breaks down polish cohesion for spreading
- Clear composition – Won’t interfere with your chosen colors
You’ll notice the polish moves differently than on a dry surface, creating marble-like effects, watercolor designs, or abstract patterns.
The gel’s chemistry transforms simple dots into intricate artwork.
Step-by-Step Basic Blooming Application Process
Now that you understand blooming gel‘s unique properties, you’re ready to create your first design. Begin by applying your base color and curing it completely.
Paint a thin layer of blooming gel over the entire nail surface—don’t cure yet.
Drop small dots of gel polish onto the wet blooming gel using a dotting tool or thin brush. Watch as the pigment instantly spreads, creating organic texture gradients. You’ll see the color disperse outward, forming soft, watercolor-like edges.
For more dramatic effects, add multiple colors that’ll blend naturally where they meet.
Work quickly since blooming gel stays active until cured. Create negative space by leaving areas untouched, letting the base color show through for visual balance.
Once you’re satisfied with the spread pattern, cure under your lamp for 60 seconds. Seal everything with a top coat and cure again. The result is a one-of-a-kind marble or tie-dye effect that’s impossible to replicate exactly.
Creating Different Pattern Effects With Color Placement
Now that you’ve mastered the basic blooming technique, you’ll transform simple dots into stunning patterns by strategically placing your colors.
You can create classic flower designs by dropping color in the center and watching it spread outward, achieve modern geometric looks through precise edge placement, or build complex marble effects by layering multiple shades.
These three placement methods—center dots, edge techniques, and color layering—give you complete control over your blooming gel’s final appearance.
Center Dot Placement
Master the art of center dot placement to transform simple nail designs into eye-catching patterns that command attention. You’ll create stunning effects by positioning your blooming gel dots strategically at each nail’s center point. This technique maximizes negative space around the edges while maintaining perfect dot symmetry across all fingers.
Follow these essential steps for flawless center placement:
- Mark your nail’s center with a tiny guide dot
- Apply blooming gel directly to the center point
- Let the gel spread naturally for 3-5 seconds
- Add color drops while the base remains wet
You’re building focal points that draw the eye naturally inward. Center dots work exceptionally well with contrasting colors, creating bold statements that bloom outward uniformly. This placement technique ensures consistent, professional-looking results every time you create blooming gel designs.
Edge Color Techniques
While center dots create uniform focal points, edge color techniques let you explore asymmetrical designs and dynamic patterns that flow across your nails. You’ll achieve striking effects by placing gel polish drops strategically along your nail’s perimeter rather than centrally.
For edge fades, apply your blooming color near one side and let it naturally disperse toward the opposite edge. This creates a gradient effect that’s perfect for ombré-inspired designs. You can control the fade’s intensity by adjusting the drop size and placement distance from the nail’s edge.
Rim highlights involve dotting color directly along your nail’s outline, creating a frame effect. Try alternating colors around the perimeter or focusing drops on just the tips or sidewalls. These techniques work especially well when you’re combining multiple shades for depth and dimension.
Layering Multiple Colors
Once you’ve mastered single-color blooming, layering multiple colors opens up endless creative possibilities for complex gel nail art. You’ll discover that strategic color placement creates stunning dimensional effects that elevate your designs beyond basic patterns.
Start with these layering techniques:
- Apply your lightest shade first as the base bloom layer
- Add darker colors in small dots over partially cured gel
- Use gradient blending between complementary hues for seamless transitions
- Create depth with ombre sponging from cuticle to tip
You’re building translucent layers that interact visually. Drop contrasting colors at different cure stages—wet gel produces soft bleeds while tacky layers yield defined edges.
Experiment with metallic over cream shades or place neon dots atop pastels. The key’s controlling cure timing between each color application for your desired effect.
Mastering Popular Blooming Gel Design Styles
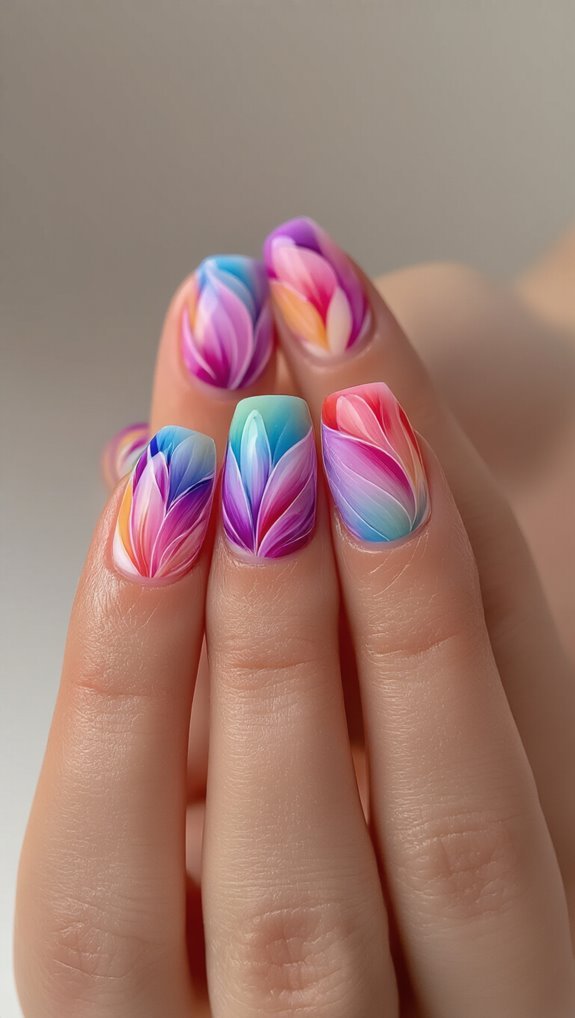
After you’ve practiced the basic blooming gel technique, you’re ready to explore the most popular design styles that nail artists love creating. The watercolor effect remains the most requested look, where you’ll drop pigments randomly and let them bloom naturally. For ombre gradients, apply colors from light to dark, allowing each shade to blend seamlessly into the next.
| Design Style | Color Placement | Final Look |
|---|---|---|
| Marble Swirl | White veins over dark base | Elegant stone texture |
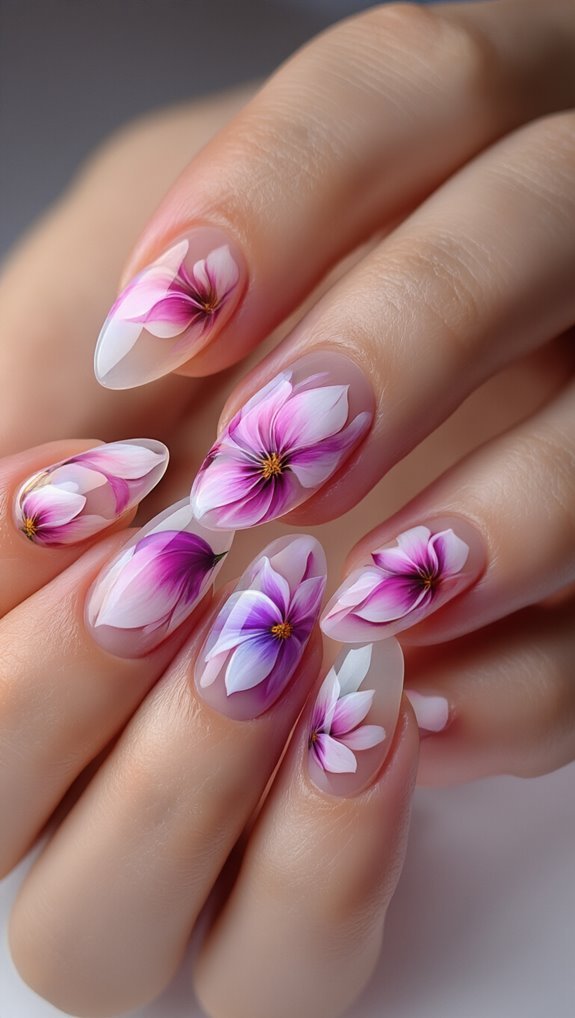
| Floral Burst | Dots in petal formation | Blooming flower effect |
| Galaxy Fade | Purple, blue, pink spots | Cosmic nebula pattern |
Gel marbling creates sophisticated patterns when you drag a thin brush through wet blooming gel. You’ll achieve the best results by working quickly before the product starts setting. Snake patterns work beautifully when you zigzag through multiple colors. Remember to seal each design with a quality top coat for lasting wear.
Troubleshooting Common Blooming Gel Problems
When your blooming gel designs aren’t spreading properly or look muddy instead of vibrant, you’re likely dealing with one of several fixable issues. The most common culprit is using too much blooming gel, which overwhelms the design polish and creates excessive color diffusion. You’ll also encounter problems when your base layer isn’t tacky enough or has cured too long.
Watch for these critical mistakes:
- Wrong polish consistency – Thick formulas won’t bloom; thin them slightly
- Incorrect timing – Apply design polish immediately after blooming gel
- Over-manipulation – Excessive dotting destroys natural texture contrasts
- Temperature issues – Cold polish spreads poorly; warm to room temperature
If your design appears patchy, you’ve probably applied uneven pressure with your dotting tool. Practice consistent, light touches for uniform spreading.
When colors blend into brown, you’re mixing complementary shades that neutralize each other. Choose analogous colors instead for cleaner results.
Tips for Achieving Professional-Looking Results
Now that you’ve mastered troubleshooting bloom gel issues, elevating your nail art to salon-quality standards requires attention to specific professional techniques. You’ll achieve the most striking designs by applying color theory principles—pair complementary shades like purple and yellow for dramatic blooms, or use analogous colors for subtle, harmonious effects.
Work under proper salon lighting or a daylight lamp to see true color accuracy. Natural light reveals imperfections you’d miss under warm indoor bulbs.
Keep your workspace organized with tools within reach, and always cap your gel bottles immediately to prevent premature curing.
Apply thin, controlled drops for precise bloom patterns. Don’t overwork the design—let the gel naturally spread for organic effects.
Seal edges carefully to prevent lifting, and cure each layer completely. Clean up any gel on the skin before final curing.
Practice your signature patterns on nail tips first, building muscle memory for consistent results every time.
Curing Times and Sealing Your Blooming Design
Since bloom gel requires specific timing to achieve optimal
Maintaining and Removing Blooming Gel Nail Art
Your blooming gel nail art can last weeks with proper care, but you’ll need to protect it from harsh chemicals and excessive water exposure.
Apply cuticle oil daily and wear gloves during cleaning tasks to prevent chipping and maintain the design’s vibrancy.
When it’s time for removal, soak cotton pads in acetone, place them on each nail, wrap with foil, and wait 10-15 minutes before gently pushing off the softened gel.
Daily Care Tips
Regularly applying cuticle oil around your nail beds will keep the blooming gel design looking fresh and prevent lifting at the edges. You’ll maintain optimal cuticle hydration by massaging oil into the skin twice daily. Wear cotton night gloves after applying hand cream to lock in moisture while you sleep.
Protect your nail art with these essential habits:
- Wear rubber gloves when cleaning or washing dishes
- Apply quick-dry topcoat every three days for extra shine
- File away snags immediately to prevent peeling
- Avoid using nails as tools to open cans or scrape surfaces
Keep hand sanitizer use minimal since alcohol can dull the gel’s finish. Instead, wash with gentle soap when possible. These simple steps will extend your blooming gel manicure’s lifespan significantly.
Safe Removal Process
When you’re ready to remove your blooming gel nail art, resist the temptation to peel or pick at the polish—this can damage your nail bed and cause painful tears. Instead, file off the top coat’s shine using a 180-grit file.
Soak cotton pads in gentle acetone and place one on each nail. Wrap fingertips with aluminum foil to secure the pads and trap heat, which speeds removal.
After 10-15 minutes, gently push off the softened gel with a cuticle pusher. Don’t force stubborn spots—reapply acetone-soaked cotton instead.
For cuticle protection, apply petroleum jelly around your nails before soaking. Once you’ve removed all gel, buff away residue, wash hands thoroughly, and moisturize with cuticle oil to restore hydration.
Frequently Asked Questions
Can I Use Regular Nail Polish Instead of Gel Polish With Blooming Gel?
You can’t use regular polish with blooming gel effectively.
Regular polish? It won’t create the desired blooming effect because it doesn’t have the right consistency or curing properties.
You’ll need gel alternatives that cure under UV/LED light.
The blooming technique specifically requires gel polish‘s unique formula to spread and create those beautiful watercolor designs.
You’re better off investing in gel polishes for this nail art technique to work properly.
Is Blooming Gel Nail Art Safe for Pregnant or Breastfeeding Women?
You should consult your doctor before using blooming gel during pregnancy.
While there’s limited research on blooming gel specifically, pregnancy precautions typically include avoiding unnecessary chemical exposure and ensuring proper ventilation.
If you’re concerned about breastfeeding exposure, wait until after nursing to do nail art, as chemicals can absorb through skin.
Many pregnant women choose to postpone gel manicures entirely.
Your healthcare provider can offer personalized guidance based on your situation.
How Much Does Professional Blooming Gel Nail Art Typically Cost at Salons?
You’ll typically pay between $40-80 for professional blooming gel nail art at salons.
Pricing ranges depend on several salon factors including location, technician expertise, and design complexity.
High-end salons in major cities often charge $60-100, while smaller establishments might offer services starting at $35.
You’re looking at additional costs if you want intricate patterns or multiple colors.
Most salons include the base gel manicure in their blooming art pricing.
Can Blooming Gel Techniques Work on Acrylic or Dip Powder Nails?
Yes, you can use blooming gel techniques on both acrylic and dip powder nails! The acrylic compatibility works perfectly since you’ll apply a gel top coat first, creating the ideal base for blooming designs.
With dip application, you’d seal the powder with a gel top coat before adding your blooming gel art. Just ensure you’re curing properly between layers, and you’ll achieve the same stunning watercolor effects on these nail types.
Where Can I Buy Quality Blooming Gel Products Online or Locally?
You can find quality blooming gel at beauty supply stores like Sally Beauty and CosmoProf for salon suppliers.
Online, you’ll discover excellent options on Amazon, eBay, and specialized nail art retailers like Daily Charme and Maniology.
Don’t overlook indie brands on Etsy offering unique formulations.
Local nail supply shops often carry professional-grade products.
Compare reviews and prices across platforms to ensure you’re getting authentic, high-performing blooming gel for your nail art.
Conclusion
You’ve now mastered the essentials of blooming gel nail art, from understanding the formula’s unique spreading properties to troubleshooting common issues. With practice, you’ll create increasingly intricate designs that rival professional manicures. Remember to work quickly before curing, experiment with color placement, and always seal your artwork properly. Don’t be discouraged if your first attempts aren’t perfect—this technique rewards patience and experimentation. Your stunning, one-of-a-kind blooming gel designs are just a few practice sessions away.