You’ll create stunning summer nail art by first prepping your nails with proper filing and cuticle care, then applying a protective base coat. Start with simple designs like tropical fruit using thin brushes and dotting tools, or try water marbling for psychedelic swirls. Build beach sunset gradients with a makeup sponge, paint daisy chains with white dots, and always seal with glossy topcoat. Master these techniques and you’ll discover professional tricks that make your artwork last weeks.
Key Takeaways
- Apply a white or light-colored base coat before creating vibrant summer designs for optimal color payoff and nail protection.
- Use dotting tools to create tropical fruit details like watermelon seeds and flower petals on your summer nail art.
- Try water marbling by dropping polishes onto water, swirling with a toothpick, and dipping nails horizontally for psychedelic patterns.
- Create beach sunset gradients by sponging horizontal stripes of purple, pink, orange, and yellow onto white base coat.
- Seal finished designs with glossy topcoat and use quick-dry drops to protect intricate artwork from smudging.
Essential Tools and Materials for DIY Nail Art
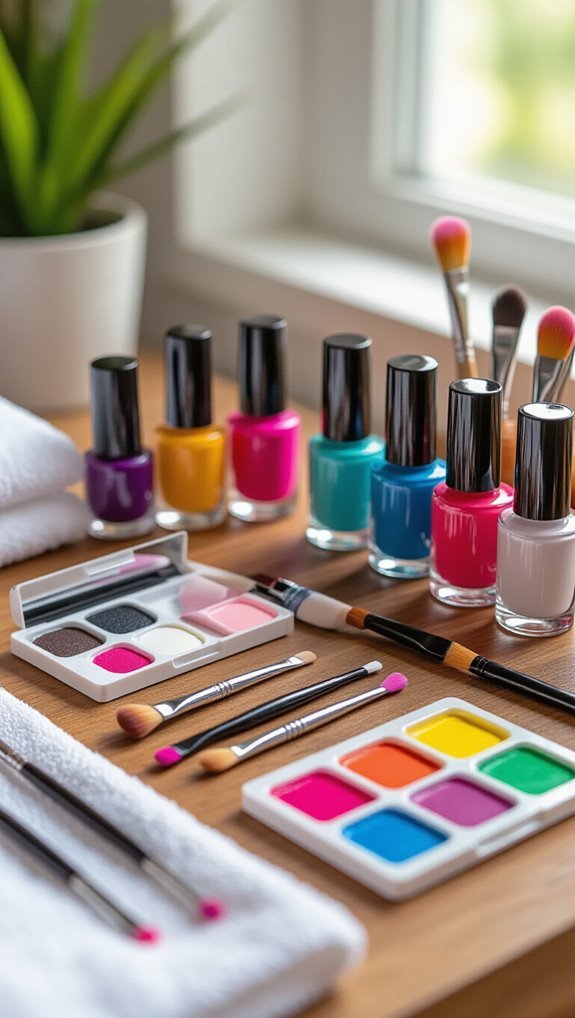
Before you dive into creating stunning summer nail designs, you’ll need to gather the right tools and materials that’ll make your DIY experience smooth and professional-looking.
Start with quality base and top coats to protect your nails and extend your art’s lifespan.
You’ll want dotting tools in various sizes for creating perfect circles and detailed patterns.
Invest in thin gel brushes for precise line work and intricate designs. They’re essential for painting delicate flowers, geometric shapes, or fine details.
Stock up on vibrant nail polishes in summer shades like coral, turquoise, and sunshine yellow.
Don’t forget white and black polishes for outlining and contrast.
Glitter pots in different colors and sizes add sparkle to any design.
You’ll also need nail tape for crisp lines, a cleanup brush with acetone, and tweezers for placing small decorations.
Keep cotton swabs, aluminum foil, and a good LED lamp handy if you’re working with gel products.
Preparing Your Nails for Summer Designs
Once you’ve gathered your supplies, you’ll need to properly prep your nails to ensure your summer designs look flawless and last longer.
Start by removing old polish completely and washing your hands thoroughly.
Next, shape your nails using a file, working in one direction to prevent splitting.
Here’s your essential prep routine:
- Soak fingertips in warm water for 5 minutes to soften cuticles
- Push back cuticles gently and perform a cuticle massage with oil
- Buff nail surfaces lightly to create a smooth canvas
- Apply a base coat to protect nails from staining
Don’t skip vitamin supplementation for stronger nails.
Taking biotin and vitamin E daily promotes healthy nail growth, especially important when you’re frequently changing designs.
After prepping, clean your nails with rubbing alcohol or nail dehydrator to remove oils.
This ensures better polish adhesion.
You’re now ready to create stunning summer nail art that’ll withstand beach days and pool parties.
Tropical Fruit Paradise Design Tutorial
With your nails prepped and ready, you’ll create a vibrant tropical fruit paradise that captures summer’s playful spirit. Start by applying a tropical ombre base using yellow, orange, and pink polishes. Blend these shades with a makeup sponge, dabbing gently from cuticle to tip.
Once dry, you’ll paint miniature fruits using a thin nail art brush. Create tiny watermelon slices on your thumb with red polish and black seeds. Add pineapple chunks on your index finger using yellow polish with crisscross brown lines. Paint orange segments on your middle finger, kiwi slices on your ring finger with green and white details, and strawberries on your pinky.
This fruit cocktail design works best with acrylic paints for precise details. You’ll need dotting tools for seeds and a steady hand for the fine lines. Seal everything with a glossy top coat to make your tropical masterpiece pop and last through summer activities.
Psychedelic Swirl Pattern Technique
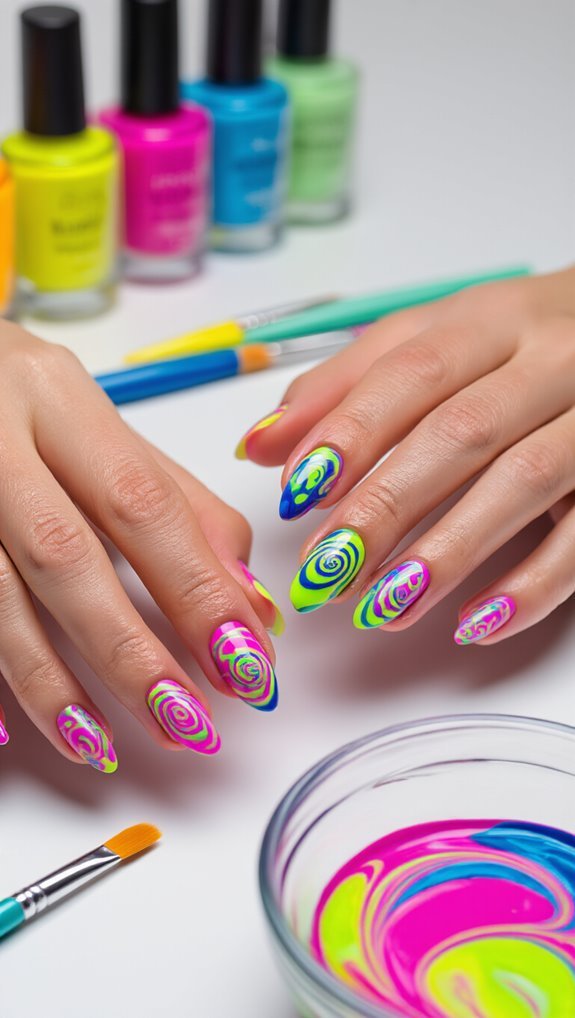
Dive into the mesmerizing world of psychedelic swirls that’ll transform your nails into miniature works of abstract art. You’ll create hypnotic patterns that capture the free-spirited essence of summer festivals and beach parties.
Start with a white base coat and let it dry completely. Drop different colored polishes onto water’s surface in a shallow dish. Use a toothpick to create optical vortices by dragging through the colors in circular motions.
This trippy marbling technique requires these essentials:
- Room temperature water for optimal polish spreading
- Quick movements to prevent polish from drying
- Tape around cuticles for easy cleanup
- Multiple color combinations for depth
Dip your nail horizontally into the design, then remove excess polish from the water’s surface before lifting your finger out. You’ll achieve stunning swirls that look professionally done.
Seal everything with a glossy topcoat to enhance the psychedelic effect and ensure your artistic creation lasts through every summer adventure.
Beach Sunset Gradient Nails Step-by-Step
Moving from abstract swirls to nature-inspired designs, beach sunset gradient nails capture those magical golden hour moments right on your fingertips. You’ll need orange, pink, yellow, and purple polishes, plus a makeup sponge for seamless ombre blending.
Start with a white base coat for vibrant color placement. Cut your sponge into small strips. Paint horizontal stripes directly onto the sponge: purple at the bottom, pink above it, then orange, finishing with yellow at the top. Don’t leave gaps between colors.
Dab the sponge onto your nail, pressing gently and rolling slightly to ensure full coverage. You’ll need multiple applications to build opacity. Between each layer, add fresh polish to your sponge and slightly overlap your dabs for smooth transitions.
Once you’ve achieved your desired gradient intensity, clean up the edges with a small brush dipped in acetone. Seal everything with a glossy topcoat to enhance the sunset effect and protect your masterpiece.
Neon Geometric Shapes Design Guide
Break out your brightest polishes because neon geometric shapes transform plain nails into bold, eye-catching statements perfect for summer festivals and pool parties. You’ll create striking angular colorblocking that demands attention and showcases your artistic flair.
Start with a white base coat to make your neon colors pop. Then grab thin striping tape to section off clean lines for your geometric design. Here’s what you’ll need:
- Neon polish in 3-4 contrasting shades
- Striping tape or nail vinyls
- Small detail brush for touch-ups
- Quick-dry topcoat for lasting wear
Apply tape diagonally across each nail, creating sections for neon triangles and other angular shapes. Paint each section with different neon shades, removing tape while polish is slightly wet for crisp edges.
Don’t worry about perfection—slight variations add character to your design. Seal everything with topcoat, and you’re ready to show off your vibrant geometric masterpiece.
Daisy Chain Flower Art Instructions
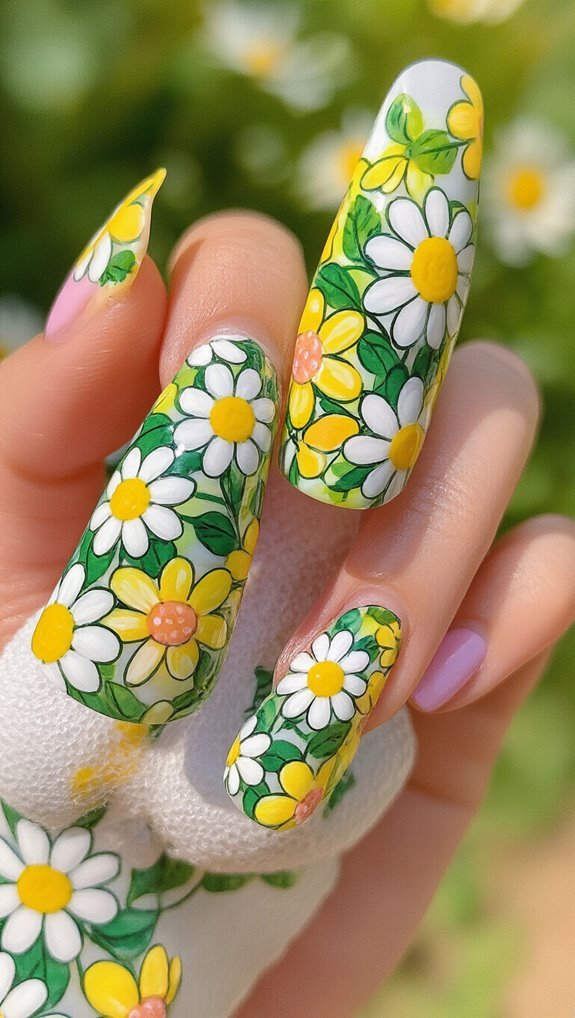
Channel your inner flower child with delicate daisy chains that bring a touch of whimsical romance to your summer manicure. You’ll create this dreamy design using simple dotting techniques that transform basic polish into blooming mini daisies connected by elegant chain accents.
Start with a pale blue or soft pink base coat. Once dry, you’ll form white mini daisies using a small dotting tool. Dip the tool in white polish and create five petals in a circular pattern, leaving space for the center. Add yellow dots in each flower’s middle using a toothpick. You’re aiming for three to four flowers per nail.
Connect your mini daisies with delicate chain accents using a thin nail art brush and green polish. Draw curved stems linking each bloom, adding tiny leaves along the path. Seal everything with a glossy topcoat to protect your garden-inspired artwork. This feminine design perfectly captures summer’s carefree spirit.
Tips for Making Your Nail Art Last Longer
While your stunning summer nail art deserves to last through beach days and poolside parties, you’ll need proper protection techniques to prevent chips and fading. Start with a quality base coat that’ll create a smooth canvas and help your design adhere better.
Here’s what you’ll need to maintain long lasting nail art:
- Apply thin topcoat layers every 2-3 days for optimal topcoat maintenance
- Use oil infusion treatments nightly to strengthen nail beds
- Keep cuticle hydration consistent with vitamin E drops
- Wear gloves during household chores and swimming
Don’t forget to cap your nail tips when applying polish—this seals the edges and prevents water from lifting your design.
You’ll also want to avoid hot showers immediately after application since heat can cause bubbling. Quick-dry drops aren’t just time-savers; they’ll help set your intricate designs properly. Finally, file away any snags immediately to prevent further damage.
Common Mistakes to Avoid When Creating Nail Art
Even though you’re excited to dive into your summer nail designs, rushing through preparation steps can sabotage your entire manicure. You’ll waste time fixing smudges and repainting nails if you don’t let each layer dry completely. Skipping base coat causes staining and reduces polish longevity.
Understanding color theory prevents clashing combinations that’ll disappoint you. Complementary colors create vibrant contrasts, while analogous shades offer harmonious blends. Test combinations on practice wheels first.
| Mistake | Consequence | Solution |
|---|---|---|
| Thick polish layers | Bubbling, extended dry time | Apply thin, even coats |
| Dirty tools | Infection, uneven application | Practice tool sanitation daily |
| Old polish | Streaky, clumpy texture | Replace every 18 months |
You’re compromising nail health by neglecting tool sanitation between uses. Bacteria accumulates on files, pushers, and brushes, potentially causing infections. Disinfect metal tools with 70% isopropyl alcohol and replace disposable items regularly. Don’t share tools—it’s unsanitary and spreads fungal infections.
Removing and Caring for Your Nails Post-Design
After you’ve enjoyed your nail art for days or weeks, you’ll need to remove it without damaging your nails. Use acetone-free remover when possible, soak cotton pads thoroughly, and press them against each nail for 10-15 seconds before gently wiping away the polish.
Once your nails are bare, apply cuticle oil daily and give them a break between designs to prevent brittleness and peeling.
Safe Polish Removal
When you’re ready to remove your summer nail art, proper technique makes all the difference in maintaining healthy nails.
Start by choosing the right removal method for your polish type. While traditional acetone works quickly, acetone alternatives like ethyl acetate or propylene carbonate offer gentler options that won’t dry out your nail beds.
Follow these essential removal steps:
- Soak cotton pads in remover and press onto each nail
- Wrap fingertips with aluminum foil for 10 minutes
- Slide off polish using gentle exfoliation with an orange stick
- Moisturize immediately with cuticle oil
Never peel or scrape stubborn polish—you’ll damage the nail plate. If glitter polish resists removal, file the top coat first to break the seal. Your nails will thank you for taking time with proper removal.
Nail Recovery Tips
Your nails need dedicated recovery time between manicures to rebuild strength and restore moisture.
After removing polish, you’ll want to let them breathe for at least 24-48 hours before applying new designs. During this break, perform a gentle cuticle massage using vitamin E oil or jojoba oil to boost circulation and promote healthy growth.
Consider taking biotin or collagen protein supplements to strengthen nails from within. These nutrients support keratin production, which forms your nails‘ structure. Apply a strengthening base coat enriched with calcium or keratin when you’re ready for your next manicure.
Keep nails short during recovery periods to prevent breakage. File them in one direction using a glass file, never sawing back and forth. You’ll notice healthier, stronger nails that hold designs better.
Frequently Asked Questions
Can I Create These Designs on Natural Nails or Do I Need Extensions?
You can absolutely create these designs on your natural nails! You don’t need extensions unless you want extra length.
Your nail health actually benefits from working with what you’ve naturally got. If you’re looking for temporary length options, try press ons – they’re perfect for experimenting with art.
Whether you choose short natural nails or longer extensions, these funky summer designs will work beautifully on any canvas you prefer.
How Much Time Should I Allocate for Completing Each Nail Art Design?
You’ll need about 45-90 minutes per design, depending on complexity. Plan your layers carefully since each coat needs proper dry time between applications. Don’t rush detail pacing – intricate patterns require steady hands and patience.
Take cleanup breaks every 20 minutes to fix mistakes with a small brush dipped in acetone. Simple designs take less time, while elaborate ones with multiple colors and techniques can stretch beyond two hours.
Are These Nail Art Techniques Suitable for Beginners With No Prior Experience?
Yes, you’ll find these techniques perfect for beginners!
You don’t need any prior experience to create stunning summer designs. Start with simple strokes using a thin brush to make basic patterns like dots and lines.
You can also use playful decals that just peel and stick for instant artwork.
The step-by-step instructions break everything down into manageable parts, so you’ll build confidence as you practice each technique.
What’s the Average Cost of Creating These DIY Designs at Home?
You’ll typically spend $30-50 on initial material costs for basic supplies like polish, dotting tools, striping tape, and topcoat.
While this seems pricey upfront, you’re looking at significant long term savings compared to salon visits that’d cost $25-40 per design.
Once you’ve bought your starter kit, each manicure only costs about $2-3 in materials.
You’ll break even after just two designs and save hundreds annually doing your own nail art.
Can I Use Regular Nail Polish Instead of Gel Polish for These Designs?
Yes, you can definitely use regular polish for these funky summer designs!
While it won’t offer the same chip resistance as gel, you’ll enjoy quick removal without soaking. Regular polish doesn’t require UV sensitivity concerns or special lamps, making it beginner-friendly.
You’ll need to reapply topcoat every few days to maintain shine, but it’s perfect for experimenting with nail art before committing to gel systems.
Conclusion
You’ve now mastered five funky summer nail designs that’ll turn heads at every beach party and barbecue. Don’t forget to seal your artwork with a quality top coat and let each layer dry completely. With practice, you’ll create these looks faster and develop your own unique twists. Keep experimenting with colors and patterns – nail art’s all about expressing yourself. Your nails are tiny canvases, so make them count this summer!