You’ll create stunning nail art using everyday household items like toothpicks for tiny dots, bobby pins for medium circles, and scotch tape for crisp geometric patterns. Start by prepping nails with a base coat, then experiment with kitchen sponges for ombre effects, plastic wrap for marble designs, or rubber bands for perfect French tips. Use sewing needles for intricate lines, pencil erasers for stamping, and steel wool for distressed metallic finishes. Master these simple techniques to transform basic manicures into professional-looking designs.
Key Takeaways
- Transform everyday items like toothpicks, bobby pins, and pencil erasers into dotting tools for polka dots and decorative patterns
- Create geometric designs using scotch tape as stencils for chevrons, stripes, and color-blocked nail art
- Apply gradient ombre effects by dabbing polish onto nails with cut kitchen sponge pieces
- Achieve perfect French tips using rubber bands stretched across fingertips as smile line guides
- Use crumpled plastic wrap to dab wet polish for marble textures and artistic effects
Essential Base Preparation and Polish Selection for DIY Nail Art
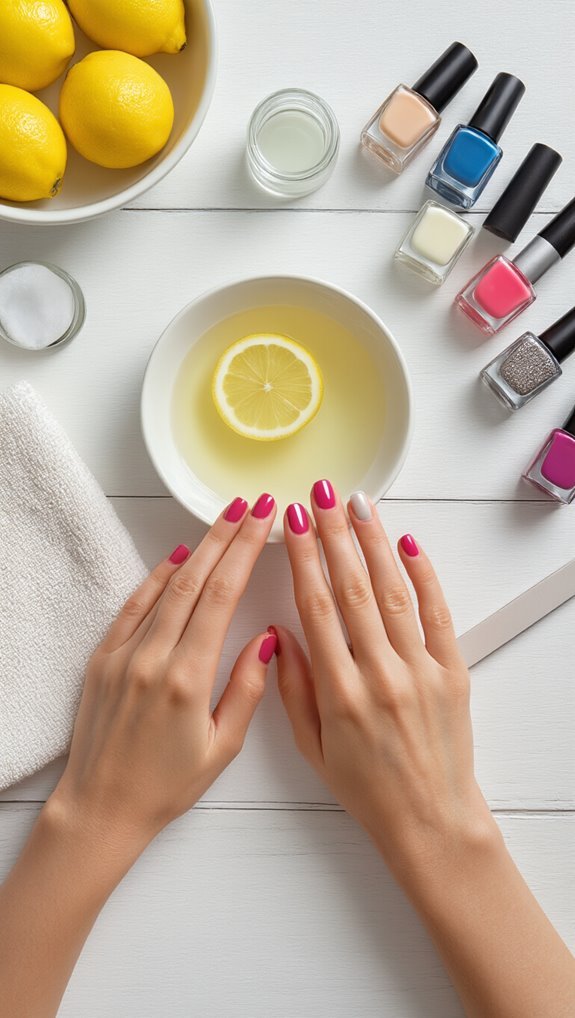
Before diving into creative nail designs with household items, you’ll need to set up your nails properly and choose the right polishes. Start your nail prep by removing old polish completely, then trim and shape your nails evenly. Push back your cuticles gently and buff the nail surface to create a smooth canvas. Apply a base coat to protect your natural nails and help polish adhere better.
For polish pairing, select colors that complement each other and match your intended design. You’ll want at least one neutral base color and one or two accent shades. Consider the finish too—matte polishes work differently with household tools than glossy ones. If you’re creating patterns with tape or stickers, quick-dry formulas prevent smudging. For sponge techniques, slightly thicker polishes deliver better coverage. Keep acetone or polish remover nearby for quick cleanup around the edges. With proper preparation and smart polish choices, you’re ready to transform everyday items into nail art tools.
Creating Perfect Polka Dots With Toothpicks and Bobby Pins
Pick up a simple toothpick or bobby pin, and you’ve got the perfect tool for creating professional-looking polka dots on your nails.
Dip the toothpick’s pointed end into your chosen polish and gently press it onto your nail’s surface. You’ll create tiny, precise dots perfect for intricate designs. For larger dots, use the blunt end instead.
Bobby pin variations offer even more versatility. The rounded tip produces medium-sized dots, while the open end creates perfect circles when dipped in polish and stamped.
You can achieve gradient effects by applying less pressure as you move across the nail.
Master these toothpick techniques by practicing consistent pressure and spacing. Start with a grid pattern, then experiment with random placement or clusters. Layer different colored dots once the base dots dry completely.
Clean your tools between colors with nail polish remover to prevent muddy results.
Mastering Geometric Patterns Using Scotch Tape and Masking Tape
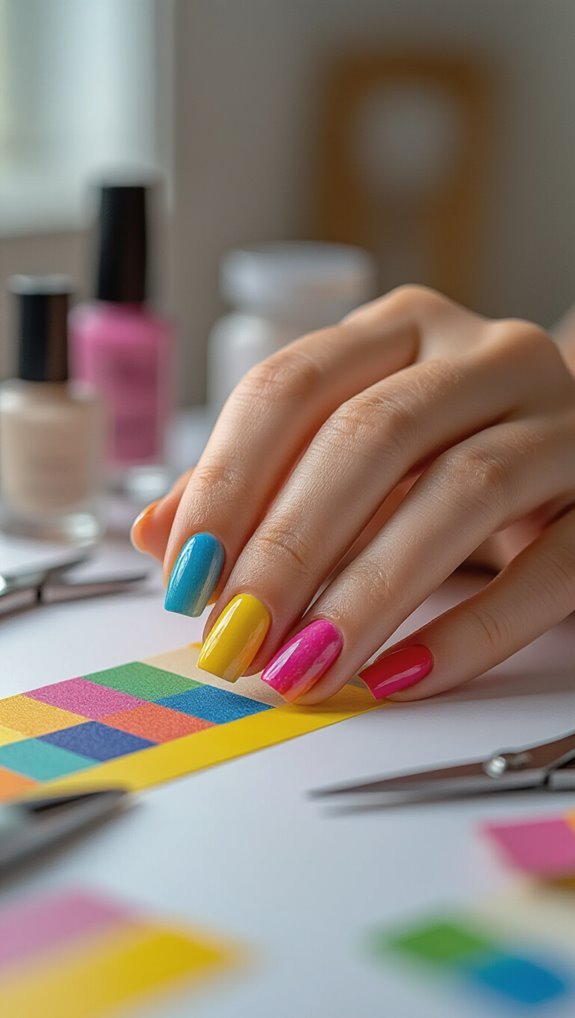
Transform your nails from dotted designs to sharp, clean lines with nothing more than tape from your desk drawer. You’ll create professional-looking geometric patterns that rival salon designs using basic scotch or masking tape.
Start with completely dry base polish—rushing this step ruins everything. Cut tape strips into thin pieces for maximum angle precision. Press them firmly onto your nails, creating triangles, chevrons, or abstract shapes. Paint over the exposed areas with contrasting colors.
- V-shaped chevrons: Place two angled strips meeting at your nail’s center
- Color blocks: Section nails into halves or quarters using straight lines
- Negative space triangles: Leave strategic areas unpainted for modern appeal
- Diagonal stripes: Create dynamic movement with parallel tape placement
Master tape layering by applying multiple colors in stages. After painting each section, let it dry completely before removing tape. Pull tape away slowly at a 45-degree angle while polish remains slightly tacky for the crispest edges you’ve ever achieved.
Achieving Marble Effects With Plastic Wrap and Water
Dive into the world of marble nail art with crumpled plastic wrap and a few drops of water—you’ll achieve those coveted swirls and veins without expensive tools.
Start by applying your base color and letting it dry completely.
Choose two or three complementary polish shades for your marble design.
Apply small dots of your chosen colors randomly across the nail.
While the polish is still wet, tear off a small piece of plastic wrap and crumple it into a loose ball.
Gently press and dab the plastic wrap onto your nail using the plastic wrap blotting technique.
The wrinkled surface creates organic patterns as it lifts and blends the colors.
For enhanced water marbling effects, add a tiny drop of water before blotting—this helps the colors flow and merge naturally.
Work quickly since the polish dries fast.
Seal your masterpiece with a top coat to smooth any texture and protect your design.
Drawing Fine Lines and Details With Sewing Needles and Safety Pins
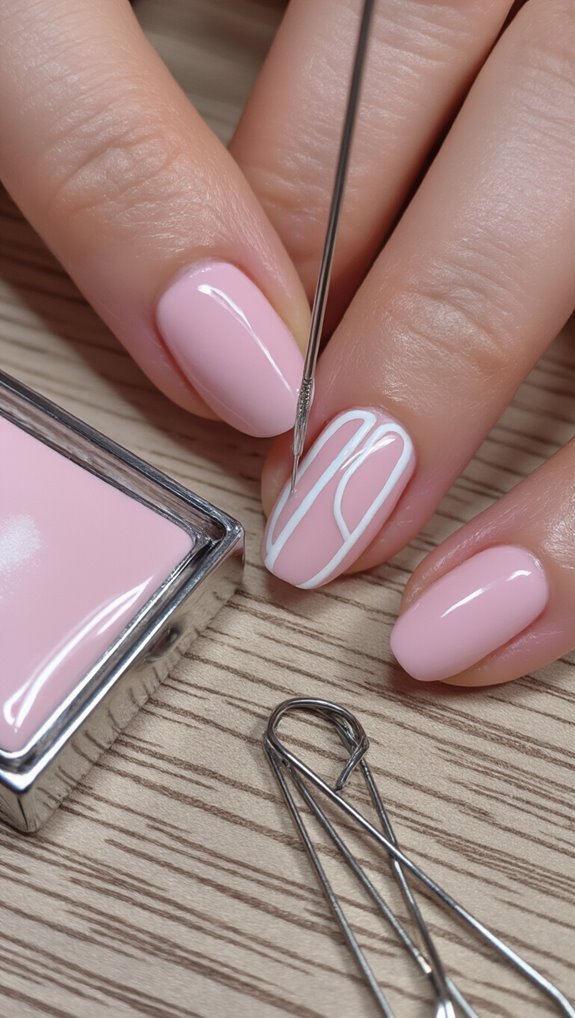
You’ll find that sewing needles and safety pins make excellent tools for creating intricate nail art details that would be impossible with a regular polish brush.
When selecting needles, choose thinner gauges for ultra-fine lines and thicker ones for bolder strokes, while safety pins work best for dotting and stippling effects.
These simple tools let you draw geometric patterns, delicate florals, or precise French tip guides by dipping them directly into polish and using a steady hand to transfer your design.
Needle Selection Tips
When you’re ready to create intricate designs on your nails, common sewing needles and safety pins become your best allies for achieving professional-looking details. You’ll find various needle sizes in your sewing kit, each offering different line thicknesses for diverse artistic effects.
Select your tools based on these essential factors:
- Thicker needles – Create bold dots and defined lines
- Fine needles – Perfect for delicate swirls and tiny details
- Safety pins – Ideal for making uniform circles and loops
- Ball-point needles – Produce smoother strokes without scratching
Always prioritize needle hygiene by cleaning tools with rubbing alcohol before and after use. If you’re planning extended nail art sessions, consider wrapping needles with tape to create ergonomic handles that’ll reduce hand fatigue and improve control.
Creating Pattern Designs
Now that you’ve selected the right needles for your nail art project, it’s time to put them to work creating stunning patterns and intricate designs.
Dip your needle’s tip in polish and drag it across your nail to form precise lines. You’ll achieve cleaner results by wiping excess polish before each stroke.
Create dots by gently pressing the needle point onto your nail’s surface. Vary pressure for different sizes. Connect dots to form flowers, hearts, or geometric shapes. For gradient outlines, start with heavy pressure and gradually lift as you drag the needle away.
Master negative space designs by drawing around unpainted areas. Use safety pins for bolder strokes and sewing needles for delicate details. Practice on paper first to perfect your technique.
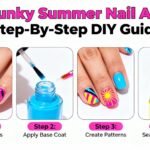
Making Gradient Ombre Nails With Makeup Sponges
Creating a stunning gradient ombre effect takes just a few simple steps with an ordinary makeup sponge from your bathroom drawer. You’ll achieve professional-looking results without expensive tools or salon visits.
Start by painting two or three polish colors directly onto a slightly damp makeup sponge in horizontal stripes. The key to perfect ombre blending lies in overlapping the colors slightly where they meet. Press the sponge onto your nail using a gentle rolling motion, adjusting your sponge placement from the base to the tip.
Essential tips for flawless gradients:
- Apply a base coat first to protect your natural nail
- Use quick, dabbing motions to build color intensity gradually
- Clean up excess polish around your cuticles with a cotton swab
- Seal with a top coat while the gradient is slightly tacky
You’ll need to work quickly since the polish on the sponge dries fast. Repeat the dabbing process two to three times for deeper color saturation.
Designing French Tips Using Rubber Bands and Paper Reinforcement Stickers
You don’t need expensive tools to create perfect French tips when common office supplies work just as well. The rubber band method involves stretching a band across your nail to create a precise smile line guide, while paper reinforcement stickers offer ready-made curved templates for foolproof application.
Both techniques let you achieve salon-quality French manicures with items you’ve probably got in your desk drawer right now.
Rubber Band Method
While traditional French manicures require steady hands and special tools, you can achieve the same polished look with rubber bands and paper reinforcement stickers from your desk drawer. The rubber band method creates perfect curves through elastic grips that stabilize against your finger.
Here’s what you’ll need:
- Thin rubber bands (hair elastics work best)
- Base coat and white polish
- Clear top coat
- Paper towels for cleanup
Start by applying your base coat and letting it dry completely. Stretch the rubber band around your fingertip, positioning it where you’d like the white tip to begin. The tension patterns you create determine the smile line’s depth. Apply white polish above the band, using quick strokes. Remove the band immediately while polish is wet. You’ll get crisp, professional-looking French tips every time.
Paper Sticker Technique
Paper reinforcement stickers offer even more precision than rubber bands for achieving flawless French tips. You’ll find these circular paper decals in your home office supplies, and they’re perfect for creating clean, curved smile lines.
Start by applying a base coat and letting it dry completely. Position the reinforcement sticker on your nail, leaving the tip exposed at your desired French manicure length. Press down firmly around the edges to prevent polish from seeping underneath. Apply white polish to the exposed tip area using smooth, even strokes.
For creative variations, try sticker layering by placing multiple reinforcements at different angles before painting. This technique creates geometric patterns and unique designs. Once you’ve painted the tips, carefully peel off the stickers while the polish is still slightly wet to avoid chipping.
Creating Textured Designs With Kitchen Sponges and Steel Wool
Transform ordinary kitchen sponges and steel wool into powerful nail art tools that create stunning textured effects. You’ll discover how these everyday items can produce professional-looking designs without expensive equipment.
Cut a clean kitchen sponge into small triangular pieces for easy handling. Apply your base coat and let it dry completely. Dab the sponge lightly into your chosen polish color, then press it onto your nails using a sponge stippling motion. This technique creates an ombre or gradient effect that’s impossible to achieve with regular brushing.
- Layer multiple colors for dimensional galaxy nails
- Use coarse sponges for bolder texture patterns
- Create marble effects by blending complementary shades
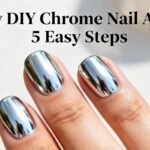
- Apply metallic polish for trendy chrome finishes
For steel wool shimmer, gently buff metallic polish over dried base colors. You’ll achieve an antiqued, distressed look that’s perfect for edgy designs.
Remember to seal everything with a quality top coat to protect your textured masterpiece.
Stamping Patterns With Pencil Erasers and Cork Pieces
You’ll find that pencil erasers and cork pieces make excellent stamps for creating professional-looking nail designs without expensive tools.
The flat surface of a new pencil eraser produces perfect polka dots, while cut cork pieces can form triangles, squares, and other geometric shapes when dipped in polish.
Remember to clean your makeshift stamps between colors with nail polish remover to prevent muddy results.
Polka Dot Designs
When you’re ready to create perfectly round polka dots on your nails, everyday items like pencil erasers and cork pieces become your best stamping tools. You’ll achieve professional-looking designs without expensive dotting tools.
Here’s what you’ll need:
- New pencil erasers for uniform circles
- Wine corks cut into small pieces
- Bobby pins for tiny dots
- Cotton swabs for medium-sized dots
Dip your chosen tool into polish and gently press onto dry base color. For striking designs, use contrast colors like black dots on white or gold on navy. Create seasonal themes by arranging dots into snowflakes for winter or flower patterns for spring. Space dots evenly for classic looks or cluster them for abstract effects. Let each dot dry completely before applying topcoat to prevent smudging.
Geometric Shape Patterns
After mastering polka dots, geometric patterns offer endless creative possibilities using the same household tools. You’ll create striking designs by cutting pencil erasers into triangles, squares, or diamonds. Simply slice clean edges with a craft knife, then dip in polish and stamp onto your nails.
| Tool | Shape Created |
|---|---|
| Square eraser | Checkerboard |
| Cork pieces | Hexagons |
| Eraser corners | Triangles |
| Halved cork | Semi-circles |
For modern designs, embrace negative space by leaving sections unpainted between shapes. You’re building visual interest through contrast. Add metallic accents along the edges of geometric shapes using a toothpick dipped in gold or silver polish. This technique transforms simple patterns into sophisticated nail art. Remember to let each layer dry completely before adding overlapping shapes.
Cleaning Your Stamps
Wipe off your makeshift stamps immediately after each use to prevent polish buildup that’ll ruin future designs.
You’ll need proper stamp sterilization between colors to maintain crisp patterns. Dip your eraser or cork piece in nail polish remover and gently press it onto a paper towel for thorough residue removal.
Here’s what you’ll need for cleaning:
- Cotton swabs soaked in acetone
- Lint-free paper towels
- Small dish of polish remover
- Clean water for final rinse
Don’t let polish dry on your stamps—it’ll create uneven surfaces that won’t transfer designs properly.
If stubborn polish remains, scrub gently with an old toothbrush dipped in remover.
Once clean, let your stamps air dry completely before storing them in a sealed container to prevent dust accumulation.
Finishing Touches and Topcoat Application for Long-Lasting Results
Having completed your creative nail designs with everyday household items, you’ll want to ensure your artwork stays pristine for days to come. Apply a quality topcoat in thin, even strokes from base to tip. This seals your design and prevents chipping. For a matte finish, use specialized topcoats that transform glossy polish into velvety texture.
| Topcoat Type | Drying Time | Durability |
|---|---|---|
| Quick-Dry | 60 seconds | 3-4 days |
| Gel-Effect | 3 minutes | 5-7 days |
| Matte | 2 minutes | 4-5 days |
Don’t forget your cuticles—they’re essential for professional-looking results. Massage cuticle oil around each nail after your topcoat dries completely. This hydrates the skin and adds shine to your nail beds. Reapply topcoat every three days, focusing on the tips where wear occurs first. Cap the free edge by running the brush across the nail’s tip. This technique creates a protective barrier that extends your manicure’s life significantly.
Frequently Asked Questions
How Do I Fix Smudged Nail Art Without Starting Completely Over?
You can fix smudged nail art with quick touchups instead of redoing everything.
For smudge salvaging, gently dab the affected area with a cotton swab dipped in nail polish remover to smooth it out. Then reapply a thin layer of polish over that spot. If it’s still wet, you’ll blend the smudge by lightly dragging a toothpick through it.
Finish with a clear topcoat to even the texture.
Can I Use Regular Markers or Pens Instead of Nail Polish?
You can use regular markers and pens for nail art, but they won’t last long. Permanent markers work best since they’re more resistant to water, though they’ll still chip within days.
Fabric pens offer vibrant colors and better adhesion than standard markers. Apply a base coat first, draw your design, then seal everything with a clear top coat. Remember, these alternatives won’t match nail polish’s durability or professional finish.
How Long Should I Wait Between Applying Different Nail Art Layers?
You’ll want to wait 2-3 minutes between thin layers and 5-10 minutes for thicker applications. Different drying times depend on what you’re using – regular polish needs longer than quick-dry formulas.
Your layer order matters too: always let base coats dry completely before adding designs. If you’re using household items like tape or stickers, make sure the polish underneath isn’t tacky. Test with your fingertip – it shouldn’t leave prints.
What Household Items Work Best for Cleaning up Messy Edges?
You’ll find cotton swabs dipped in nail polish remover work perfectly for cleaning messy edges around your cuticles.
If you don’t have remover, try acetone wipes or even rubbing alcohol on a Q-tip.
For precision cleanup, wrap a small piece of paper towel around an orange stick or toothpick, then dip it in acetone.
You can also use a small angled makeup brush with remover for smoother edge correction.
Is It Safe to Use Superglue for Attaching Nail Decorations?
You shouldn’t use regular superglue on your nails due to superglue toxicity concerns. It contains harsh chemicals that aren’t formulated for skin contact and can cause burns or allergic reactions.
If you’ve already applied it, adhesive removal becomes extremely difficult and may damage your nail bed. Instead, you’ll want to use nail-specific glue or clear polish to attach decorations safely. These products are designed for cosmetic use and won’t harm your nails.
Conclusion
You’ve discovered that stunning nail art doesn’t require expensive tools – just creativity and everyday items from around your home. With these simple techniques, you’ll transform plain nails into miniature masterpieces using toothpicks, tape, and sponges you already own. Don’t be afraid to experiment and combine different methods to develop your unique style. Practice these techniques regularly, and you’ll soon master the art of DIY manicures that rival professional salon designs.