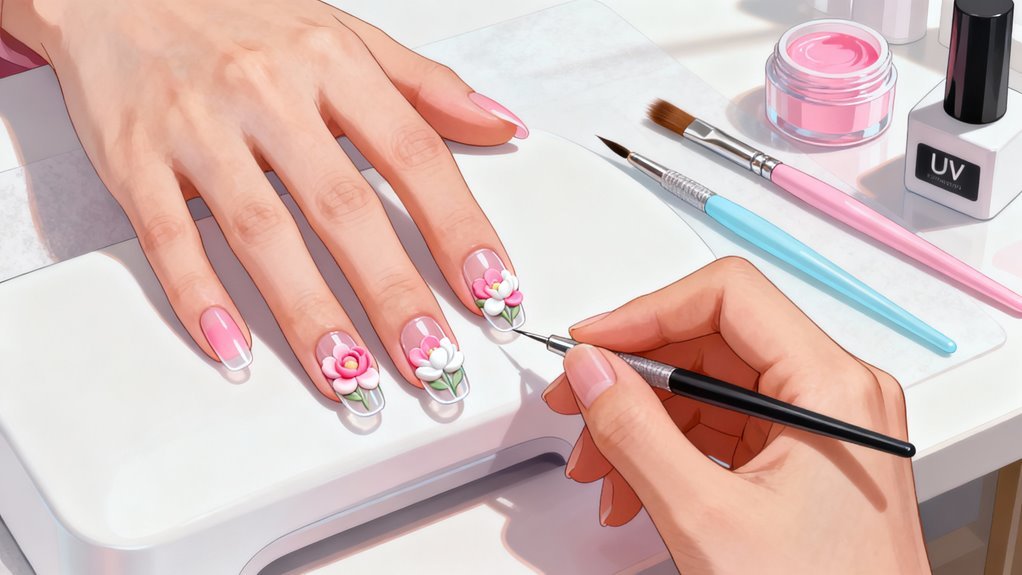
You’ll start 3D nail art by prepping your nails with cuticle care and a base coat, then choose between acrylic powder mixed with monomer or UV-curing gel for your medium. Create basic shapes like dots and teardrops using dotting tools, building flowers petal by petal from the center outward. Cure each gel layer for 30 seconds under your UV lamp, then seal everything with a thick topcoat cured for 60-90 seconds. Master these fundamentals before tackling advanced sculptures.
Key Takeaways
- Start with pre-made embellishments like rhinestones and charms while practicing basic sculpting shapes like dots and teardrops.
- Prepare nails by pushing back cuticles, buffing surfaces smooth, and applying base coat for better adhesion.
- Mix acrylic powder with monomer at 1.5:1 ratio or use 3D gel for more working time before curing.
- Build dimension gradually by layering smaller elements on larger bases, working from nail base toward tip.
- Seal designs with thick gel topcoat and cure for 60-90 seconds under UV/LED lamp for protection.
Essential Tools and Materials for 3D Nail Art
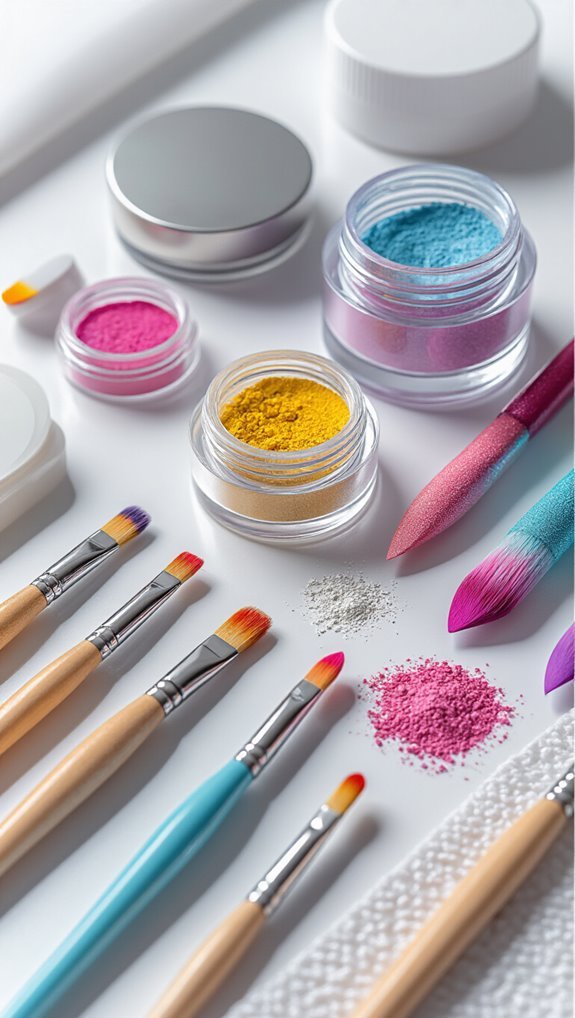
Three essential tool categories will set you up for successful 3D nail art creation. First, you’ll need sculpting tools including dotting tools, sculpting brushes, and silicone shapers for molding acrylic or gel materials. Second, gather your materials: 3D gel, acrylic powder with monomer, nail glue, and embellishments like rhinestones, charms, and dried flowers.
Third, don’t overlook safety equipment. Proper nail ventilation is crucial when working with chemicals—use a desk fan or ventilation system to prevent inhaling fumes. Consider artist ergonomics by investing in an adjustable lamp with magnification and a padded armrest to reduce strain during detailed work.
You’ll also want basic supplies: a UV/LED lamp for curing, alcohol or slip solution for smoothing, and fine-tipped tweezers for precise placement. Start with a quality base and top coat specifically formulated for 3D designs. These tools transform flat manicures into dimensional art pieces that showcase your creativity.
Preparing Your Nails for Dimensional Designs
Before you create stunning dimensional designs, you’ll need to properly prep your nail surface for optimal adhesion and longevity. Start your nail prep by pushing back cuticles gently and trimming any excess skin. Your cuticle health directly impacts how well 3D elements adhere near the nail bed.
Next, you’ll shape and buff your nails to create a smooth canvas. Use a fan brush to sweep away dust particles that could compromise your design’s foundation. Complete oil removal is crucial—wipe each nail with rubbing alcohol or a dehydrating solution to ensure maximum product adhesion.
- Transform brittle nails into strong, professional-looking canvases
- Feel confident your intricate designs won’t lift or chip prematurely
- Experience the satisfaction of salon-quality results at home
- Watch your creativity flourish on perfectly prepped surfaces
- Enjoy compliments on your long-lasting dimensional masterpieces
Apply a base coat immediately after prepping to seal in your hard work and protect the natural nail.
Understanding Different 3D Nail Art Mediums
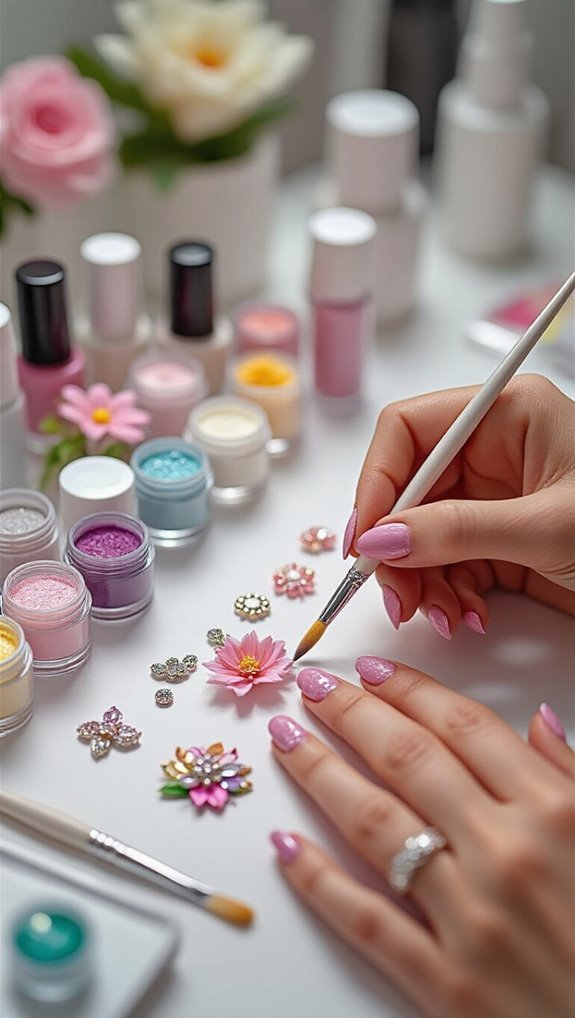
Once you’ve prepped your nails, you’ll need to choose the right medium for your dimensional designs. Each material offers unique advantages and requires specific techniques to master.
Acrylic powder remains the most popular choice for beginners. You’ll mix it with liquid monomer to create moldable beads that harden quickly. It’s perfect for flowers, bows, and geometric shapes.
Gel molding provides more working time since it won’t cure until you place it under UV light. You can sculpt intricate details and reposition elements before setting them permanently.
Polymer clay lets you create detailed charms separately before attaching them to your nails. You’ll bake these pieces in an oven, then secure them with nail glue.
Nail jewelry and rhinestones offer instant dimension without sculpting skills. You’ll simply apply them with gel or glue for quick embellishments.
Consider starting with pre-made 3D elements while you practice sculpting techniques with your chosen medium.
Basic Techniques for Working With Acrylic Powder
You’ll master acrylic powder by learning three fundamental skills that form the foundation of dimensional nail art.
Start by understanding the liquid-to-powder ratio—too wet creates runny beads while too dry results in crumbly, unworkable material.
Once you’ve nailed the consistency, you’ll practice picking up uniform beads with your brush and sculpting them into shapes before they cure, then refine your designs through precise filing techniques.
Mixing Proper Ratios
Mastering the liquid-to-powder ratio transforms your acrylic work from amateur to professional. You’ll need to achieve the perfect 1.5:1 liquid-to-powder balance for optimal consistency. Start your ratio testing with small batches, adjusting until you find your sweet spot.
Temperature effects play a crucial role in mixing. Warmer rooms speed up curing time, requiring less liquid, while cooler environments need slightly more monomer. You’ll notice the mixture should resemble wet sand that holds its shape without running.
- Feel the satisfaction when your bead holds perfectly
- Experience confidence as sculptures maintain their form
- Enjoy the smooth, workable consistency you’ve created
- Celebrate fewer product wastages and redos
- Pride yourself on professional-looking results
Practice making consistent beads daily. You’ll develop muscle memory that guarantees perfect ratios every time.
Bead Formation Methods
Dip your brush into the monomer at a 45-degree angle, then gently press it against the dish’s edge to remove excess liquid before touching the acrylic powder. You’ll create different bead sizes depending on your design needs.
For intricate details, form micro beadlets by barely touching the powder’s surface with a nearly dry brush. These tiny beads work perfectly for delicate petals or dots.
When creating dimensional flowers or bows, you’ll need medium-sized thermal beads that generate slight heat as they cure. Pick up more powder by rolling your brush gently through it. The bead should look like a glossy pearl on your brush tip. If it’s too wet, it’ll flood your design. Too dry, and it won’t adhere properly.
Shaping and Filing
Shape your freshly applied acrylic while it’s still pliable by pressing and molding it with your brush during the first 30-60 seconds after application. Once it’s hardened, you’ll need proper filing techniques to refine your 3D designs.
Hold your file at consistent filing angles—45 degrees for contouring and 90 degrees for precision edges. Practice proper nail ergonomics by supporting your client’s finger and keeping your wrist straight to prevent fatigue.
- Transform rough beads into smooth, professional sculptures
- Create dimensional flowers that’ll make hearts skip
- Build confidence with every perfectly shaped curve
- Watch clients’ faces light up at intricate details
- Master techniques that set you apart from competitors
File in one direction using gentle strokes. Start with coarse-grit files for shaping, then switch to fine-grit for smoothing.
Creating Simple 3D Shapes and Textures
Once you’ve gathered your tools and materials, you’ll want to start with basic 3D shapes that build your confidence without overwhelming your skills. Begin with dots and teardrops using acrylic powder or gel. These foundational shapes form flowers, hearts, and bows when combined strategically.
| Shape | Tool Needed | Difficulty |
|---|---|---|
| Dot | Dotting tool | Beginner |
| Teardrop | Fine brush | Beginner |
| Petal | Sculpting brush | Intermediate |
| Bow | Tweezers + brush | Intermediate |
| Rose | Detailing brush | Advanced |
Practice creating matte textures by mixing acrylic powder with minimal monomer for a rougher finish. You’ll achieve dimension through layering—build petals individually rather than attempting complex shapes immediately. Add glow accents using phosphorescent powder mixed into clear gel for subtle luminosity. Press shapes gently onto tacky base polish, ensuring proper adhesion. Work systematically from nail base toward tip, allowing each element to partially cure before adding adjacent pieces.
Mastering the Art of Nail Flowers and Petals
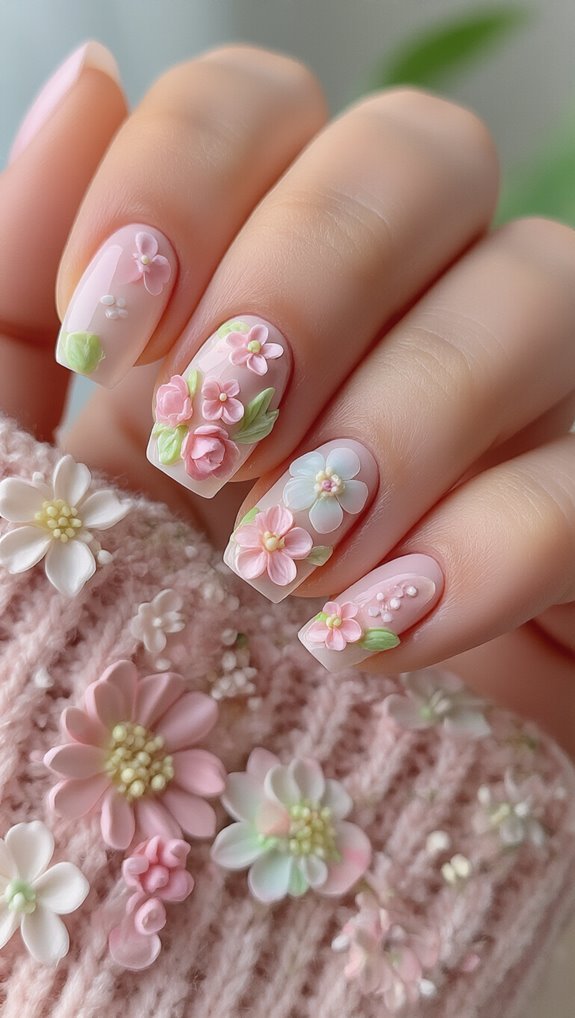
You’ll start crafting dimensional flowers by forming basic petal shapes using small dots of gel or acrylic that you’ll manipulate with a fine brush or dotting tool.
Build your flowers from the center outward, layering each petal slightly over the previous one to create realistic depth and movement.
Master color blending by working wet-on-wet with your medium, gently swirling lighter shades into darker ones at the petal edges for natural gradients.
Basic Petal Shapes
Breaking down petal creation into simple steps will transform your nail art from flat designs to eye-catching dimensional flowers.
You’ll start with teardrop shapes for classic petals, then progress to rounded forms for softer blooms.
Create matte petals by using non-glossy gel polish, building thin layers for depth.
For iridescent petals, apply chrome powder over tacky gel before curing.
Master these essential petal variations:
- Pointed petals – Sharp tips for roses and lilies
- Curved petals – Gentle arcs for cherry blossoms
- Ruffled edges – Textured borders for peonies
- Layered petals – Overlapping shapes for fullness
- Tiny petals – Delicate forms for forget-me-nots
Practice shaping petals with your dotting tool while the gel’s still pliable.
You’ll develop muscle memory quickly through repetition.
Layering Flower Dimensions
Now that you’ve mastered individual petal shapes, stacking them creates the depth that makes 3D flowers pop off the nail. You’ll build dimension by placing smaller petals on top of larger ones, working from the base upward. Start with five base petals, then add three to four smaller petals in the second layer, rotating them between the gaps below.
Use negative space strategically between layers to prevent bulkiness and maintain definition. You’re aiming for a graduated effect where each tier is slightly raised. Apply thin coats of gel between layers, curing for 30 seconds each time. For contrast, combine glossy petals with matte finishes on alternating layers. This technique enhances visual depth while keeping the overall height manageable for daily wear.
Color Blending Techniques
When you’re ready to elevate your 3D flowers beyond basic shapes, color blending transforms simple petals into realistic botanical art. You’ll achieve depth by applying color theory principles to create omre gradients that mimic nature’s subtle transitions. Start with lighter shades at petal tips, gradually deepening toward the base.
Master these essential blending techniques:
- Wet-blend acrylics while they’re tacky for seamless transitions
- Layer translucent gels over opaque bases for dimensional effects
- Mix complementary colors at edges for natural shadows
- Apply powder pigments to wet surfaces for soft diffusion
- Use tiny brushes to feather harsh color lines
You’ll discover that temperature affects blending speed—warmer conditions accelerate drying, requiring quicker work. Practice on tips first before attempting client applications.
Building Bows, Ribbons, and Geometric Patterns
As you move beyond basic 3D shapes, creating bows, ribbons, and geometric patterns opens up exciting design possibilities that’ll transform your nail art from simple to stunning.
Start with bows by rolling two small acrylic balls, flattening them into teardrop shapes, and positioning them at angles to form loops. Add a tiny center ball to complete the bow structure.
For ribbons, draw fabric inspiration from real textiles. Roll thin acrylic snakes, then gently twist and curve them across the nail surface. Press lightly with your dotting tool to create realistic folds and dimension.
Geometric patterns require precision and planning. Begin with triangles and squares, using a fine brush dipped in monomer to clean edges. Stack shapes for depth or arrange them in repeating patterns.
These designs work perfectly with seasonal motifs—think snowflake geometrics for winter or floral-inspired hexagons for spring. Practice building each element separately before combining them into complex compositions.
Advanced Sculpting Tips for Complex Designs
Once you’ve mastered basic shapes, you’re ready to tackle more intricate designs by layering multiple elements to create depth and dimension. You’ll combine different sculpting techniques to build complex pieces like detailed flowers or miniature characters, placing each component strategically to achieve a cohesive look.
Adding realistic textures through specialized tools and careful manipulation of your medium will transform flat surfaces into lifelike details that make your 3D nail art truly stand out.
Layering Multiple Elements
Building complex 3D nail designs requires you to master the art of layering multiple elements without creating a bulky, unstable structure.
You’ll need to work systematically, allowing each layer to cure completely before adding the next.
Start with larger base elements, then gradually add smaller details on top.
Consider shadow placement when positioning each piece—overlapping elements should create natural depth without blocking light entirely.
Always perform adhesion testing between layers by gently pressing each element after partial curing.
This ensures your design won’t fall apart later.
- Feel accomplished when pieces align perfectly
- Experience pride in your dimensional creations
- Discover excitement through endless combinations
- Build confidence with each successful layer
- Transform simple nails into wearable art
Creating Realistic Textures
While layering creates dimension, texture brings your 3D nail art to life through realistic surface details that fool the eye. You’ll master advanced sculpting by understanding how different tools create varied effects.
For matte textures, press a fine-grit buffer against wet gel before curing. This technique works perfectly for creating velvet petals, suede bows, or frosted glass elements. Use a dotting tool to stipple surfaces for leather-like finishes.
Achieve metallic embossing by pressing foil transfer sheets onto tacky gel layers. You can also drag a thin brush through chrome powder for raised metallic veins on leaves or wings. Try combining both techniques—create a matte rose with metallic embossing on the edges for stunning contrast.
Remember to seal textured elements with appropriate topcoats that won’t diminish your carefully crafted surface details.
Sealing and Protecting Your 3D Nail Art
After you’ve spent time creating your intricate 3D nail art, you’ll need to seal and protect your work to ensure it lasts.
Apply a thick gel topcoat over your design, being careful not to drag through raised elements.
For optimal topcoat longevity, use a high-quality product specifically formulated for 3D art.
UV curing is essential—expose each nail for 60-90 seconds under your lamp to fully harden the protective layer.
Benefits of proper sealing:
- Your artwork stays pristine for weeks without chipping
- Colors remain vibrant and won’t fade or yellow
- Embellishments won’t snag on clothing or hair
- You’ll feel confident showing off your masterpiece
- Hours of creative effort won’t go to waste
Don’t rush this final step.
If you notice any uncured spots, add another thin layer and cure again.
For extra durability, apply cuticle oil daily around the sealed edges to prevent lifting and maintain flexibility.
Troubleshooting Common 3D Nail Art Problems
Even with careful sealing, you’ll likely encounter some challenges as you develop your 3D nail art skills. If your embellishments keep falling off, you’re probably using too little adhesive or applying decorations to oily nail surfaces. Clean the nail with rubbing alcohol before application and use adequate gel or glue.
When 3D elements appear bulky or uneven, you’ve likely added too much product at once. Build thin layers instead, curing between each application. For professional-looking dimension, incorporate airbrush effects by lightly dusting shimmer powder over raised areas before the final seal.
Bubbling in your topcoat indicates trapped air or moisture. Apply thinner coats and let each layer settle before curing. If your 3D art looks flat in photos, adjust your lighting tips—position a lamp at a 45-degree angle to create shadows that emphasize texture and depth. This technique highlights your dimensional work effectively.
Frequently Asked Questions
How Much Should I Charge Clients for 3D Nail Art Services?
You’ll want to establish pricing tiers based on design complexity – charge $10-20 for simple 3D accents, $25-40 for moderate designs, and $45+ for elaborate work.
Factor in your material costs, time invested, and local market rates.
Consider offering service add ons like gem placement or hand-painted details for extra revenue.
Start with competitive prices while you’re building your portfolio, then gradually increase rates as your skills and reputation grow.
Can I Do 3D Nail Art if I Have Allergies to Certain Chemicals?
Yes, you can still do 3D nail art with allergies, but you’ll need to take precautions. Look for hypoallergenic alternatives to traditional acrylics and gels – many brands now offer formaldehyde-free and low-odor options.
Always conduct patch testing before using new products on yourself or clients. You’ll also want to work in well-ventilated areas, wear nitrile gloves, and consider using water-based adhesives instead of chemical-heavy products.
How Long Does 3D Nail Art Typically Last Before Needing Removal?
You’ll find 3D nail art typically lasts 2-3 weeks with proper care, though typical durability depends on your daily activities and the materials used.
You’re looking at shorter wear time if you frequently use your hands for heavy work.
Following maintenance tips like wearing gloves during cleaning, avoiding hot water exposure, and applying cuticle oil daily will extend your design’s life.
Most professionals recommend removal after three weeks maximum.
Is 3D Nail Art Safe for Pregnant Women to Wear?
You’re generally safe wearing 3D nail art during pregnancy, but you’ll want to ensure proper salon ventilation to minimize exposure to fumes.
The decorative elements themselves pose no prenatal safety concerns once they’re applied and dried. However, you should avoid lengthy exposure to nail adhesives and sealants during application.
If you’re applying them yourself, work in a well-ventilated area and consider wearing a mask to reduce chemical inhalation during the process.
Where Can I Find Inspiration for Unique 3D Nail Art Designs?
You’ll find endless inspiration for unique designs on Pinterest boards dedicated to nail art, where artists share their latest creations daily.
Browse Instagram hashtags like #3dnailart and #nailartdesigns for trending styles.
Nature motifs offer fantastic starting points—think butterfly wings, flower petals, or seashells.
You can also explore nail art magazines, YouTube tutorials, and local nail salons’ portfolios.
Don’t forget to screenshot designs you love for future reference.
Conclusion
You’ve learned the fundamentals of creating stunning 3D nail art, from selecting the right tools to mastering basic sculpting techniques. Don’t get discouraged if your first attempts aren’t perfect—you’ll improve with each design you create. Start with simple shapes and gradually work toward more complex patterns. Remember to seal your artwork properly for long-lasting results. Keep practicing these techniques, and you’ll soon transform your nails into miniature masterpieces that showcase your creativity.