You’ll need neon polishes in electric pink, lime green, and cyber yellow, plus striping tape and thin brushes for precision. Start with a white base to make colors pop, then create geometric patterns using tape for crisp checkerboards or zigzag designs. Apply contrasting combinations like hot pink against black for maximum impact. Add holographic decals, rhinestones, or chrome powders for that authentic ’90s vibe. Master these techniques to transform your nails into nostalgic works of art.
Key Takeaways
- Apply white base coat under neon polishes to maximize brightness and achieve authentic 90s fluorescent impact on pink, orange, yellow, and green shades.
- Create geometric patterns using striping tape to mask sections, then paint contrasting neon colors over alternating squares for classic checkerboard designs.
- Blend multiple neon shades using a makeup sponge from tip to smile line for gradient ombré effects characteristic of 90s style.
- Draw lightning bolts and zigzag patterns with thin striping brushes using high-contrast color combinations like neon yellow on black backgrounds.
- Layer chevron shapes and triangular elements with neon polishes over dark bases to recreate bold Aztec and tribal-inspired geometric motifs.
Essential Tools and Materials for Authentic ’90s Nail Art
Before you dive into creating those iconic ’90s nail looks, you’ll need to stock up on the right supplies that defined the era’s distinctive aesthetic.
Start with a collection of vibrant neon pigments in electric pink, lime green, bright orange, and cyber yellow – these bold shades were the decade’s signature colors. You’ll also need quality nail primers to ensure your designs stay put and pop against the base.
Grab some striping tape for those sharp geometric patterns that dominated ’90s fashion. Don’t forget a thin detail brush for precise line work and a dotting tool for creating perfect circles and accent details.
White and black polishes are essential for outlining and creating contrast. A good top coat will seal your artwork and add that glossy finish reminiscent of the era.
Finally, pick up some nail art pens for freehand designs and metallic polishes to capture that futuristic Y2K vibe.
The Classic Neon French Manicure With a Twist
Take your standard French manicure and crank it up to eleven with bold neon tips that scream ’90s nostalgia. You’ll transform the traditional white tips into electric statements using vibrant pinks, greens, oranges, and yellows. The beauty of this style lies in its versatility and eye-catching appeal.
Master these neon tip variations to nail the authentic ’90s look:
- Double French: Layer two neon colors for dimensional tips—try hot pink over electric blue
- Asymmetrical French: Paint tips at different angles on each nail for an edgy, unconventional finish
- Gradient Neon: Blend multiple fluorescent shades from tip to smile line
You’re not limited to straight smile lines either. Create zigzag patterns, curved waves, or geometric angles where the neon meets your natural nail. Apply a glossy topcoat to make those colors pop even harder. This modernized twist on the French manicure perfectly captures the decade’s bold, experimental spirit while remaining surprisingly wearable today.
Creating Bold Checkerboard Patterns Like a Pro
Moving from neon tips to geometric designs, checkerboard patterns dominated ’90s nail art with their striking black-and-white contrast that channeled everything from ska culture to racing flags. You’ll achieve the cleanest squares by using striping tape to section off your nail into a grid. Apply your white base coat first, then let it dry completely before adding tape in horizontal and vertical lines.
Paint black polish over alternating squares, removing the tape while the polish is still slightly wet to prevent chipping. For a modern twist, try contrast pairing with unexpected colors like hot pink and lime green, or metallics against matte finishes. You can also incorporate negative space by leaving some squares unpainted, letting your natural nail show through for added dimension. The key’s maintaining crisp lines—use a thin brush dipped in acetone to clean up any bleeding between squares. This pattern works best on shorter nails where proportions stay balanced.
Mastering the Iconic Zigzag and Lightning Bolt Designs
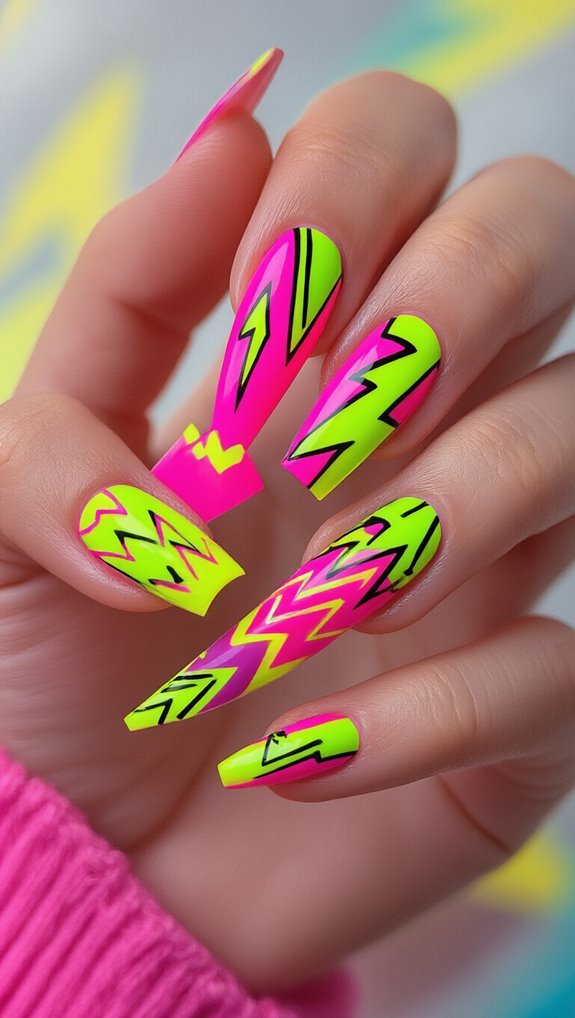
While checkerboard patterns offered structured geometry, zigzag and lightning bolt designs brought dynamic energy to ’90s nails with their sharp angles and electric movement. You’ll find these bold zigzags surprisingly simple to create with the right technique.
Start by applying your base color and letting it dry completely. For electric bolts, you’ll need:
- A thin striping brush or nail art pen for precision
- Contrasting polish colors (think neon yellow on black)
- Steady hand movements in quick, confident strokes
Create your design by painting diagonal lines that connect at sharp points. Don’t overthink it—the beauty lies in the spontaneous energy.
For lightning bolts, add small branches extending from the main zigzag line. You can also use tape to mask off sections for ultra-crisp edges.
These designs work best on accent nails or as repeating patterns across all ten fingers. Seal everything with a quick-dry topcoat to preserve your electrifying ’90s masterpiece.
DIY Holographic and Chrome Effect Techniques
You’ll achieve that coveted 90s chrome finish using two main techniques that transformed nail art during the decade.
Foil application methods involve pressing metallic transfer sheets onto tacky polish for an instant mirror-like effect. Powder chrome techniques require buffing ultra-fine metallic pigments directly onto your nails’ surface to create that liquid metal look everyone wanted.
Foil Application Methods
Breaking into the world of metallic nail art doesn’t require expensive salon treatments when you’ve got foil application techniques at your fingertips. Transfer foil creates stunning chrome effects that’ll transport your nails straight back to the 90s club scene.
You’ll need these essential supplies:
- Foil adhesive or tacky base coat
- Transfer foil sheets in metallic shades
- Orange stick for precise placement
Start by applying adhesive to your base color and let it become tacky—it should feel sticky but won’t transfer to your finger. Press the foil’s colored side up against the nail, then quickly pull away. The metal leafing transfers instantly, creating mirror-like patterns.
For geometric designs, use tape to section off areas before applying adhesive. Seal everything with a quality top coat to prevent chipping.
Powder Chrome Techniques
Beyond traditional foil methods, powder chrome techniques deliver that coveted liquid metal finish that defined 90s nail culture. You’ll achieve the most reflective results by applying mirror powders over a tacky gel base coat. Rub the powder onto your nail using a silicone applicator or eyeshadow sponge in circular motions until you’ve created a seamless metallic surface.
For holographic effects, you’ll want magnetic pigments that shift colors depending on the viewing angle. Apply these powders the same way, but cure under UV light between layers to build dimension. Don’t forget to seal everything with a no-wipe top coat—this locks in the chrome effect and prevents chipping. The key is working quickly while your base remains slightly sticky for optimal powder adhesion.
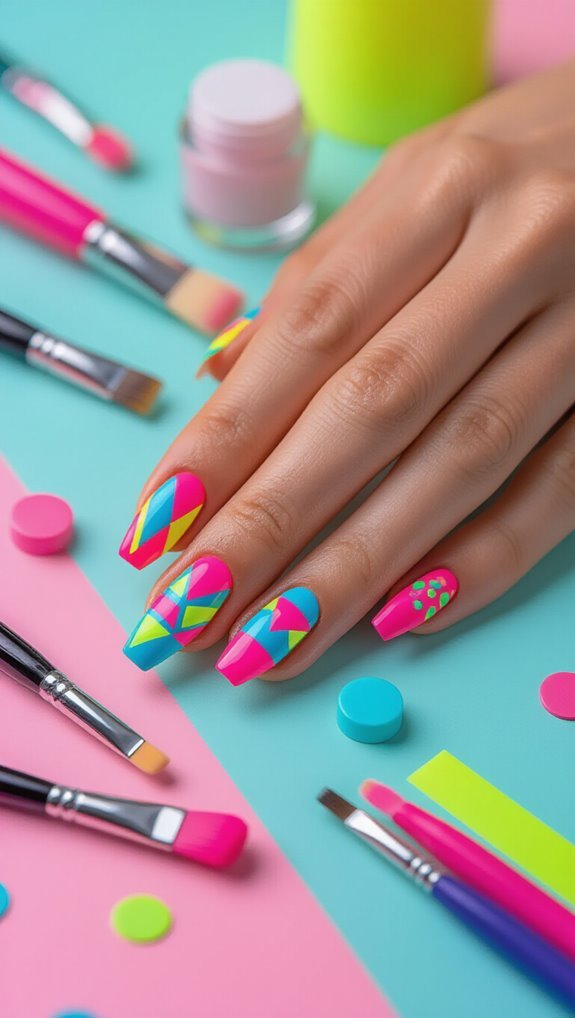
Geometric Color Blocking With Electric Shades
Sharp angles and bold divisions defined the geometric color blocking trend that electrified ’90s nail art. You’ll recreate this look by combining neon colorblocking with precise tape placement for razor-sharp lines. Start with a white base coat to make electric shades pop, then map out your design using striping tape or nail vinyls.
Create striking geometric negative space by leaving calculated sections bare while filling others with vibrant hues. You’re working with:
- Electric blue paired with hot pink triangles
- Lime green diagonal stripes against purple blocks
- Orange and yellow checkerboard patterns
Apply thin coats to prevent bleeding under tape edges. Remove tape while polish is slightly tacky for crisp lines. You’ll achieve the sharpest angles by pulling tape at a 45-degree angle away from the wet polish. Seal everything with quick-dry topcoat, focusing on edges where colors meet. This technique transforms your nails into miniature abstract art pieces that capture the decade’s fearless aesthetic.
Tribal-Inspired Patterns and Abstract Line Work
You’ll capture the decade’s cultural fusion trend with bold Aztec motifs featuring zigzags, triangles, and stepped pyramids in contrasting colors.
These geometric tribal patterns dominated nail art alongside minimalist line work that created striking negative space designs.
Transform your nails into wearable art by combining thick black outlines with pops of turquoise, coral, or gold for that authentic 90s tribal aesthetic.
Bold Aztec Motifs
Transform your nails into miniature canvases with bold Aztec motifs that dominated the ’90s nail art scene. You’ll create striking geometric patterns that capture the era’s fearless aesthetic using angular shapes and high-contrast colors.
Master these essential Aztec-inspired techniques:
- Layer neon chevrons over dark base coats for maximum visual impact
- Use striping tape to achieve crisp tribal negative space designs
- Combine triangular elements with zigzag patterns for authentic complexity
Start with a white or black base, then add your geometric elements using thin brushes or nail art pens. You’ll find that metallic gold accents elevate the design, while incorporating turquoise and coral creates that signature ’90s southwestern vibe.
Practice symmetry on accent nails first before attempting full sets.
Minimalist Line Art
While Aztec motifs celebrated bold complexity, minimalist line art emerged as the ’90s answer to understated nail elegance. You’ll master this trend by embracing negative space as your canvas and creating delicate contours with precision. Start with a nude or clear base coat, then use striping tape to guide your thin brushwork.
| Design Element | Application Tip |
|---|---|
| Single curves | Draw from cuticle to tip |
| Parallel lines | Space 2mm apart |
| Abstract angles | Connect at 45° points |
| Floating shapes | Center on nail bed |
You’re working with restraint here—less truly becomes more. Black polish creates the strongest impact against pale backgrounds, but don’t overlook navy or deep burgundy for subtle variation. These designs prove you don’t need elaborate patterns to make a statement.
The Art of Mixing Neon Gradients and Ombré Effects
When you’re ready to capture that quintessential 90s vibe, combining neon gradients with ombré effects creates the perfect throwback manicure. You’ll achieve maximum impact by blending electric shades that seamlessly transition from one color to another. Start with a white base coat to make your neon fade pop, then apply your lightest shade first.
Master these essential techniques for authentic 90s gradients:
- Sponge blending – Dab colors onto a makeup sponge and press onto nails for smooth transitions
- Vertical vs. horizontal – Create vertical fades for elongated fingers or horizontal for bold statements
- Color combinations – Pair pink-to-orange, blue-to-green, or yellow-to-pink for classic looks
Perfect your ombré layering by working quickly while polish remains wet. You’ll need to overlap each color slightly, using gentle strokes to blur harsh lines. Don’t oversaturate your sponge—light layers build better depth than heavy application. Finish with a glossy topcoat to enhance the gradient’s dimensional effect.
Adding Retro Embellishments: Rhinestones, Studs, and Decals

Jazz up your 90s nails with the era’s most iconic embellishments—rhinestones, metallic studs, and holographic decals that defined the decade’s maximalist aesthetic. You’ll transform basic manicures into statement pieces by strategically placing these elements.
Start with rhinestones at your cuticle line or create diagonal patterns across accent nails. Apply them using nail glue or embed them in wet topcoat. Mix sizes for visual interest—combine 3mm stones with smaller 1.5mm pieces.
Add metallic studs along nail edges or cluster them at corners. They’ll catch light differently than rhinestones, creating dynamic contrast. Balance these shiny elements with matte accents on neighboring nails to prevent overwhelming your design.
For decals, choose butterfly motifs, tribal patterns, or alien heads—90s classics. Apply them over dry polish, then seal with topcoat. Create glitter clusters around decals using loose glitter and clear polish for that authentic throwback vibe.
Setting and Maintaining Your ’90s-Style Manicure
You’ll need the right products to lock in your nostalgic nail art and keep it looking fresh for days.
Start with a quality base coat to prevent staining from those bold ’90s colors, then seal everything with a quick-dry top coat that won’t smudge your carefully placed decals or rhinestones.
Keep a matching polish handy for quick touch-ups when chips appear, especially on the tips where wear shows first.
Quick-Dry Top Coat
Often overlooked in the excitement of creating bold ’90s nail designs, a quality quick-dry top coat serves as the essential final step that transforms your manicure from temporary art to lasting statement.
You’ll protect your intricate geometric patterns and vibrant neons while achieving a professional fast finish in minutes.
Apply your top coat using these techniques:
- Float the brush over wet polish without pressing down
- Work quickly from cuticle to tip in three strokes
- Seal the free edge to prevent chipping
Choose formulas with solvent resistance to maintain shine despite exposure to cleaning products and hand sanitizers.
You’re investing time in recreating authentic ’90s aesthetics, so don’t skip this crucial step.
A good quick-dry top coat ensures your nostalgic nail art stays pristine for days.
Base Coat Essentials
Building up from a proper foundation makes all the difference between a manicure that chips within hours and one that survives the week. You’ll need thorough nail prep before applying any base coat—file edges smoothly and push back cuticles gently. Don’t skip skin hydration around your nails; moisturized cuticles prevent peeling and cracking.
| Base Coat Type | Best For | Key Benefits |
|---|---|---|
| Ridge-Filling | Uneven nails | Smooth surface |
| Strengthening | Brittle nails | Prevents breaks |
| Hydrating | Dry nails | Moisture retention |
Smart ingredient selection matters when choosing your base coat. Look for formulas without toluene or formaldehyde if you’re sensitive. Always do allergy testing on one nail first—wait 24 hours before committing to a full manicure. You’ll save yourself from potential reactions while ensuring your ’90s geometric patterns and neon shades stay vibrant.
Touch-Up Tips
That perfect base coat sets you up for success, but keeping your ’90s nail art looking fresh requires strategic touch-up techniques. You’ll need quick fixes for those bold geometric patterns and neon shades that show every imperfection.
Master these essential maintenance moves:
- Cuticle cleanup – Dip a small brush in acetone to erase polish that’s migrated onto skin during application
- Polish corrections – Use tape or vinyl stickers to re-crisp blurred lines between color blocks
- Chip prevention – Apply thin top coat layers every two days, focusing on tips where wear happens first
Don’t wait until your design’s completely ruined. Fix small mistakes immediately with a toothpick dipped in remover.
For neon colors that fade quickly, add a fresh thin layer right over the existing polish to revive that ’90s vibrancy.
Frequently Asked Questions
Can I Achieve These Designs With Regular Nail Polish Instead of Gel?
Yes, you can definitely create these designs with regular polish!
You’ll want to start with a breathable basecoat to protect your nails and help the colors pop.
Apply thin coats of your neon shades, letting each layer dry completely.
For precise geometric patterns, nail stickers work perfectly with regular polish.
Finish with a quick dry topcoat to seal your design and speed up drying time between layers.
How Long Does It Typically Take to Complete a Full ’90s Manicure?
You’ll need about 1-2 hours for a complete ’90s manicure, depending on design complexity. Your time estimate should include prep steps like removing old polish, shaping nails, and pushing back cuticles (15-20 minutes).
The base coat and color application takes 20-30 minutes with drying time. Creating geometric patterns or detailed designs adds another 30-45 minutes.
Don’t forget you’ll need extra drying time between layers and for the final topcoat.
Are These Bold Neon Designs Appropriate for Professional Work Environments?
You’ll find traditional neon designs aren’t typically workplace appropriate, but you can create office friendly variants that capture the ’90s spirit.
Try muted pastels instead of electric colors, keeping geometric patterns subtle on accent nails only. You can maintain bold contrasts using navy and cream or burgundy and gold combinations.
Save full neon manicures for weekends, but incorporate toned-down versions of these retro styles for professional settings without sacrificing personality.
What’s the Average Cost of Getting ’90s Nail Art at a Salon?
You’ll typically pay $40-80 for ’90s nail art at most salons, though complex geometric designs can push salon pricing to $100+.
The intricate hand-painted details and multiple neon colors require extra time and skill. Don’t forget tipping etiquette – you should add 15-20% for your nail technician’s artistic work.
Some high-end salons charge $120-150 for elaborate retro designs with special effects like chrome or holographic finishes.
How Often Should I Change My ’90s Nail Art to Prevent Damage?
You should change your ’90s nail art every 2-3 weeks to prevent damage.
This schedule gives your nails adequate nail rest between applications, allowing them to breathe and recover.
You’ll maintain proper moisture balance by removing old polish before it chips or peels, which can strip natural oils.
If you’re using gel or acrylics for bold geometric designs, don’t exceed three weeks—longer wear weakens your nail bed and causes brittleness.
Conclusion
You’ve now mastered the essential techniques to recreate authentic ’90s nail art that’ll turn heads and spark nostalgia. Whether you’re rocking neon French tips, bold checkerboards, or holographic chrome effects, you’re ready to bring back the decade’s most iconic manicure trends. Don’t forget to seal your designs properly and maintain them between applications. Mix these techniques, experiment with color combinations, and most importantly, have fun channeling your inner ’90s rebel through your fingertips.